
Have you ever completed (or mostly completed) a project, then stepped back and were in disbelief that you actually just created that? That's where I am right now with my bookcase. I'm channeling Steve Urkel- "Did I do that??" Apparently I did.
The construction is complete, and it's time to start on the finish work- patching, priming, painting.... but OMG guys, it looks fantastic!!! The decorative trim really makes the piece!

Naturally, it took longer to get here than I wanted. Originally, I though I could maybe get it done in a weekend. Maybe the ACTUAL building took a weekend, but the planning and prepping took much longer. Totally worth it though!
Like I mentioned on Friday, Remodelaholic's step by step bookshelf DIY was an amazing place to start and really helped me wrap my head around how to build this beast. On Friday, I showed you the basic skeleton, and shockingly it came together pretty easily from there. I'll show you the over-simplified steps.
Getting the top and bottom attached were the most time consuming, since, as I've mentioned before: my house = not level.
Once I got the top and bottom attached like I showed you Friday, I attached the sides, then the shelf supports.

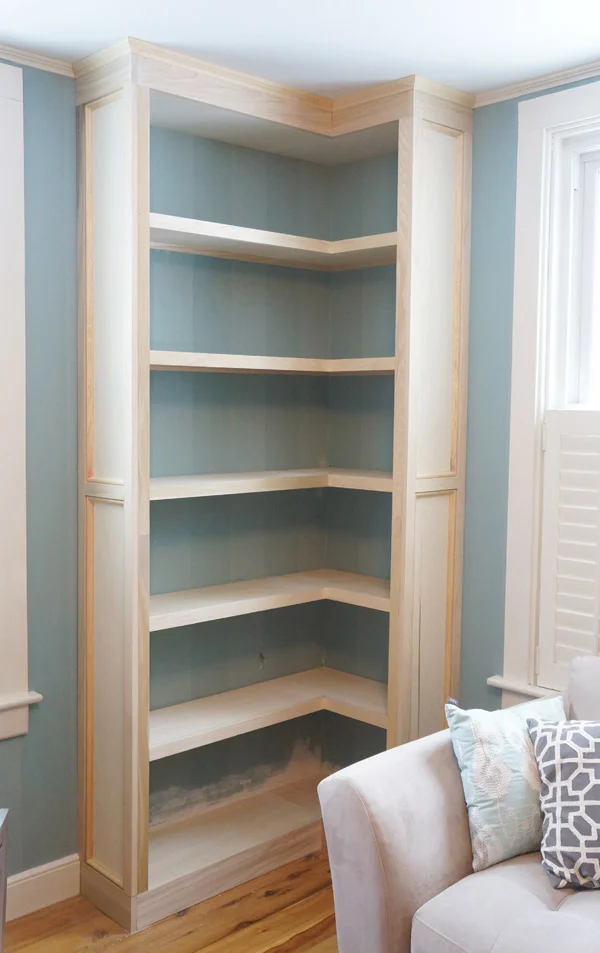
Once all the supporting pieces were in, it was time for the fun part- nailing in the shelves and starting to apply the finish trim pieces.

Once I had all the basic trim pieces up, it was starting to look pretty sturdy.

My absolute favorite step was the decorative trim and crown. Totally took it to the next level!


I still need to patch, caulk, sand and paint like a mad woman, but I'm so excited to have this built!

Now the only thing left to debate is: should the back be white or should I paint it gray for a little contrast?
UPDATE: check out the finished built-in and my first attempt at styling it here.
UPDATE #2: If you love this project, check out my latest build- a DIY TV cabinet here.