DIY

Swap: Eclectic Tray

Let's Swap it Like it's HOT! swap

No matter how much I try to plan, Swap Day always seems to creep up on me!  Confused about what I'm talking about?  Swap it Like it's Hot is a fun thrift/diy swap between a bunch of amazing bloggers.  We head to the thrift store with a budget of around $10 and then we send our finds to someone else for them to re-envision, transform, DIY, or generally make awesome.  This is my 4th time participating in this diy extravaganza organized by Charlotte of Ciburbanity.  Check out my previous Swap It projects: Dipped Art & Plant Holder, Rustic Lamp, & Book Planter.

This time around, I was sent thrifted goodies from Erin Spain and I have to admit, she had me pretty stumped for a bit!  She sent me a basket with ducks on it, a "wood" plaque, a white pot, and 2 small metal trays.  For quite a while I was trying to figure out how I could transform, combine, or reinvent one or more of these pieces.


swap-it-before


Finally an idea clicked so I decided to give it a shot!  I left the ducks out of this project- maybe I'll paint the basket in the future, but not today... Sorry ducks!!  My plan was to combine the trays, plaque and planter into one collage of a tray.  Not the most remarkable reuse, but I think the pieces ended up looking a bit better in the end!


swap-it-parts-before


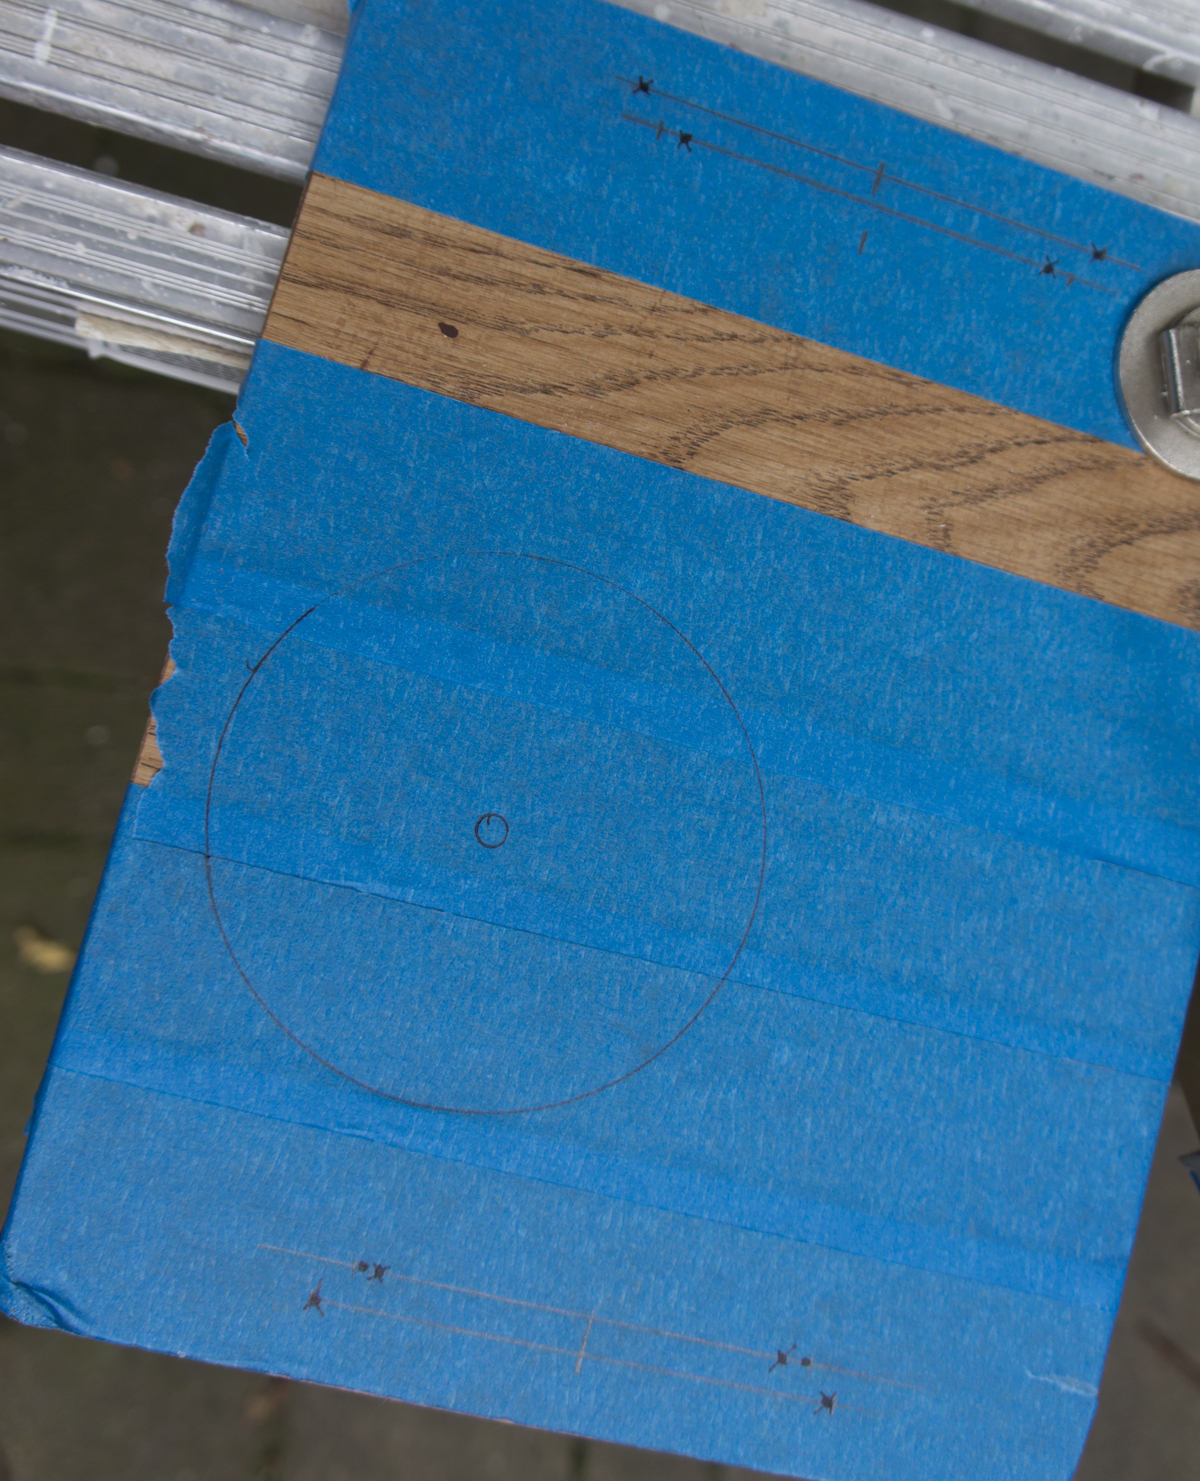
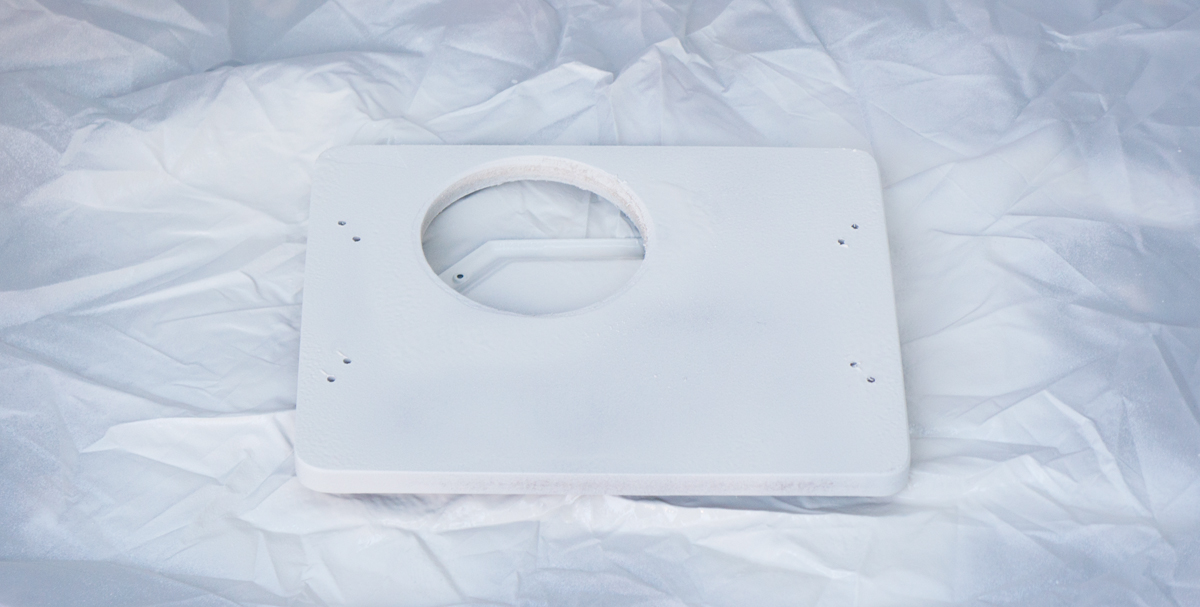
I started by taking the tab off the top of the wood plaque (which was sadly laminate, not a real wood that I could stain), and taking the handles off of both little trays.  I covered it with blue tape so that I could mark where I needed to drill- 4 holes on each side for 2 sets of handles and a 4" hole for the plant pot to sit in.


swap-it-drill-holes-marked


After all the holes were in place, I quickly sanded the surface with a high grit sandpaper, and wiped it down with a sander/deglosser.  Then came spray primer and paint!


swap-it-paint


And let me assure you, everything was done with the proper safety precautions.  I'm not getting this kid high on spray paint fumes!

After the paint was dry, I used super glue in the small holes to affix the handles in place, and added felt pads to the bottom.


swap-it-eclectic-tray


I admit, this isn't my favorite swap result of all time, but I am pleased with the way the double brass handles look on the silver sprayed tray.  It would be totally cute on a night stand holding a glass of water and chapstick, or on a coffee table to help corral remote controls, don't you think?


swap-it-eclectic-tray2


Now please run, don't walk, and check out what Amanda at Prim and Propah did with the goodies that I sent her!  What would you create with these items?


swap-it-sent


The fun's not over yet!  Check out all the AMAZING transformations that have been happening ALL WEEK!  I haven't had a chance to check them all out myself yet, but the ones that I have will blow you away!!


Save

MONDAY

Ciburbanity

Windgate Lane

Vin'yet Etc.

Casa Watkins Living

One Mile Home Style

TUESDAY

Reinvented

ConfettiStyle

Confessions of a Serial Do-It-Yourselfer

Addicted 2 DIY

Restoration Redoux

I Am a Homemaker

Maggie Overby Studios

PMQ For Two

WEDNESDAY

Two Thirty-Five Designs

58 Water Street

Create & Babble

Dogs Don't Eat Pizza

Gourley Girl and Guy

The Charming Farmer

THURSDAY

This is our Bliss

Southern State of Mind

Two Purple Couches

My Life From Home

FRIDAY

Erin Spain

Copper Dot Interiors

Prim and Propah

Sweet Tea Refinishing

Eveys Creations

On Fern Avenue

Save

Save

Save

Save

Save

Project Flashback: UP-Dated Built-in

built-in-styled-4.jpg

Without a flip going on currently, I'm really itching to build something.  I think I get a bit twitchy when I haven't touched power tools for too long.  For YEARS I've been talking about creating a built-in bookcase in my dining room, but I'm still mulling over ideas, gameplans for building it, and thinking about all the details.  The idea has been nagging at me lately, so when timehop popped up to remind me of a post from 2 years ago where I had a bit of fun with a built-in in one of the flips, I thought it would be fun to share again! Here's the original post from 2014 when I was working on the fliphouse Grover:


WARNING: long post ahead!  But don't worry- it'll be informative AND have a few pretty pictures!

When I'm coming up with my plans for my flips, there's a delicate balance between keeping original charm and getting rid of dated design features.

Exhibit A

Dated scalloped built in before

Built-in = original charm..... almost arm-deep = awkward......scallops = dated!

I think the scallops were the first thing I ripped out in the house.  I attempted to remove the fake wood paneling from all 3 sides of the shelves, but I just couldn't get in there without causing injury (even my attempts caused several bruises and band-aids).  For the past 4 months, the poor built-in has sat in this sorry state:

build-in-demo

build-in-demo-ceiling

But I had a plan for it!  And now, I think it's hitting all the right notes!

Dated built in after via year of serendipity

Original charm- CHECK

Fresh and clean-CHECK

Usable space-CHECK

Free of awkward and dated design features- CHECK CHECK!

Dated built in styled via year of serendipity

It surprisingly only took me a day to build.  Wood working projects are probably the most fun for me- that and tiling.  You see things come together right before your eyes.

Supplies:

2x4s for structure

thin plywood for the sides, back and 'ceiling' on the top shelf (I actually used materials left over from the bathroom paneling)

1x2 pine decorative trim

Screws and nails

Half of the work in projects like this is just the figuring out and planning what you want to do.  The other half is playing with power tools (fun AND fun!)

My first step to make my plans happen was to create a new structure with 2x4s to reduce the size of the shelves.  I pre-drilled screw holes using my Kreg jig, however, even the best laid plans don't always work out.

built-in-building

I forgot to take into account the size of the drill and it wouldn't fit in the 2 shorter shelves to allow me to use my carefully planned holes.  Womp womp.  Luckily, I was able to screw in the side and no one will be able to tell in the end.

When installing the 2x4s, I made sure to use my level so that each piece of the hidden structure would be straight.

built-in-structure

Next it was ply-wood's turn.

build-in-plywood

I put a piece of plywood on the new back as well as on both sides since the side walls were a bit damaged.  I'll admit, the back 'wall' between the 2x4s is a little bouncy, but since the back is purely decorative, I opted not to add additional structure.

build-in-plywood-done

Looking better already!  Next it was time for the finish trim.  This was the part that really modernized this project.  Sides first, then I measured in between.

built-in-trim1

To install the trim, I used my nail gun and 2" finish nails, to attach them both the the walls and the shelves.

built-in-trim2

To spare you additional boring pictures, I patched holes, primed, and then sanded before getting to caulking all the corners.  I used my go-to caulk method: a squeeze tube of caulk (easier to maneuver than a caulk gun), and a small bucket of water.  I use the bucket to both dunk my hand before wiping down a bead of caulk, but to also wash the caulk off my hand as I go- it get's very sticky otherwise.  The caulk magically filled all the gaps at the joints and gives it a professional, finished look.  In the pic below, just look at the contrast between the bottom, caulked shelf and the top uncaulked shelf.

built-in-caulk

Ta da!

built-in-sans-paint

Meanwhile across the room, the doors were getting fresh paint and new pulls.

built-in-paint-doors

Once all the caulk was dry, the built-in got several layers of white semi-gloss trim paint. I allowed the paint to dry overnight before I layered on the tchotchkes..... I mean styled it.

Updated built-in styled via year of serendipity

Updated built-in styled via year of Serendipity

Faux plants Dining room styled via year of serendipity

Just updating the built-in makes the entire open living/dining area look clean, fresh, and updated, but will still charm the pants off of any buyer.

Built-in styled and updated via year of serendipity


Even years later, that project makes me smile.  Such a small, inexpensive update, made a HUGE difference in the room.  Check out the entire space when it was done:

Grover-dining-kitchen-after-2


I'm hoping that building one in my own dining room will have a similar positive impact.  I'm such a sucker for dining room built-ins!

Have an awesome weekend!!


Save

Project Flashback: DIY Wine Rack

wine-rack-angle.jpg

Have you entered Monday's giveaway yet?  Time is running out! With no flip still (trust, me, we're TRYING but this spring market is just too hot!  I wish I was selling a house now!), I'm itching to break out the power tools.  For some reason though other projects like planting and mulching the yard and cleaning out the basement for a well over due tag sale are taking precedent.  Instead of a new project to add to my to do list, I thought today we could reminisce about an old one.

Still one of my favorite projects- and still in use- is my kitchen wall-mounted wine rack.  Here's original post from back in 2013:

It's time for some wine!

DIY wine rack close-up

We've had a severe lack of wine in this house lately, because we haven't had space for a wine rack.  Hubby's been challenging me to make a custom wall-mounted one for months, so with the kitchen reno (hopefully) nearing an end, I realized this was the perfect time.  (and who am I to say no when Hubby request a DIY)

It all started with a quick sketch when I was watching tv one night last week.

DIY wine rack sketch

The dimensions got modified a bit as the project progressed, but this was a great place to start.  I enlisted Handy Dad's help for another set of hands (and maybe for his tools as well... maybe).

The materials:

  • 8' length of 1x6 poplar
  • Kreg jig screws
  • Wood glue
  • Toggle screws (for mounting to the wall)

The tools we used:

  • Chop saw
  • Drill press (a regular drill could work too, but it would be a bit more work)
  • 3 1/4" hole saw drill bit
  • Clamps
  • Kreg jig

The first step was to cut the boards to the desired length and mark out where my holes will go (this is where the dimensions got modified a bit).

DIY wine rack marks

Actually cutting the holes was the most difficult part.  We clamped the 2 side boards together so that the holes would line up perfectly.  To prevent as much splintering as possible, we drilled most of the way through one side, then completed the hole by drilling from the other side.  Slow and steady...

DIY wine rack drill press

This was my attempt to take a photo of all the pieces on a white background.  #whitebalancefail

DIY wine rack pieces

As you can see on the back pieces, I used my Kreg jig to drill pocket holes.  My friend Kreg is awesome- it's a very simple drill guide and special bit that makes it super easy to strongly join 2 pieces of wood.  I first read about it on Young House Love, and I quickly jumped on the Kreg bandwagon.

Next came assembly.  Every joint got wood glued and clamped, and the back supports were screwed together with Kreg screws for extra support.

DIY wine rack assembly

After assembly, I sanded the bejesus out of it, painted it with 2 coats of paint, and mounted it to my kitchen wall with toggle bolts (when all filled, the rack can weigh almost 30 pounds!)

DIY kitchen wine rack

So, what do you think?  I think it fits perfectly in it's new home!

I originally had staggered the direction of the bottles, but Hubby and I both liked it a bit better this way.

DIY wine rack

I can't wait to reveal the whole kitchen to you- it's really becoming my favorite designed room in the house!

DIY wine rack closeup

Back to 2016 now- this project has held up perfectly!  Aside from a few scuffs from a rotating array of wine bottles being slid in and out, it still looks as good as the day it was built.  Some other projects don't even last 3 months in this house let alone almost 3 years!

Have an awesome weekend!