Flipping

Grover: Week 14

I hope you enjoy these weekly updates as I learn to navigate through the business of flipping houses.  Check out more about this flip, Grover, or check out posts about our last flip HERE. It's crunch time!  I want to have this house listed in less than a month.  Hustle, Karen!!  Thankfully, with the floors now mostly complete with 2 coats and all of the remaining walls primed, it's finally starting to look like something.

w14-light-bright

After everything else is done, the floor will get a 3rd coat so they are flawless and gleaming for when we list.  I seriously couldn't be happier with the floors- I'm crossing my fingers that it'll be a HUGE selling feature.

Also on the list of big ticket items that I didn't do myself but that got done this week.  A roof!

w14-roof

Rather unsexy, but completely necessary to sell the house.

Meanwhile inside, I kept myself busy as always.

w14-kitchen

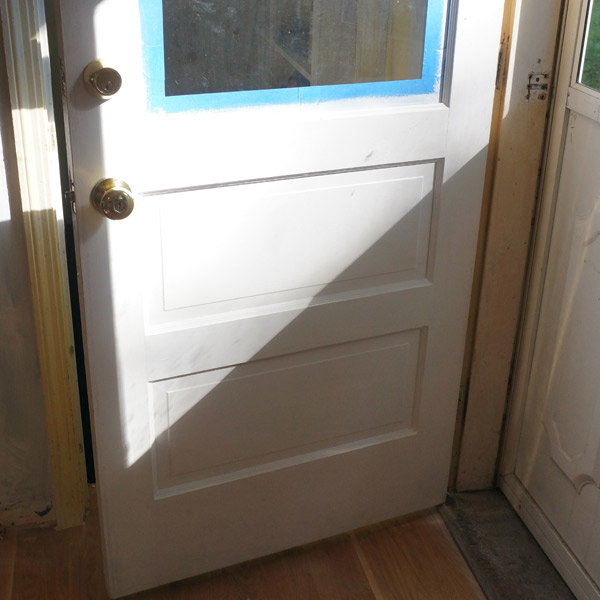
In addition to my usual patching, sanding, and priming (and banishing all of the old dark colors), the living room ceiling got painted, the back door got new trim around it (like this tutorial from flip #1), I repaired all the other door frames where the previous owner had arbitrarily cut chunks out of the bottom (?), I finally primed over an obscene drawing that was on the exterior of the back door,

w14-back-door

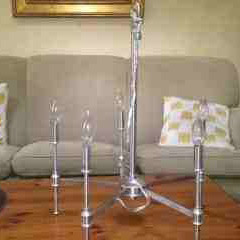
drooled over the hard wood floors some more,

w14-wood

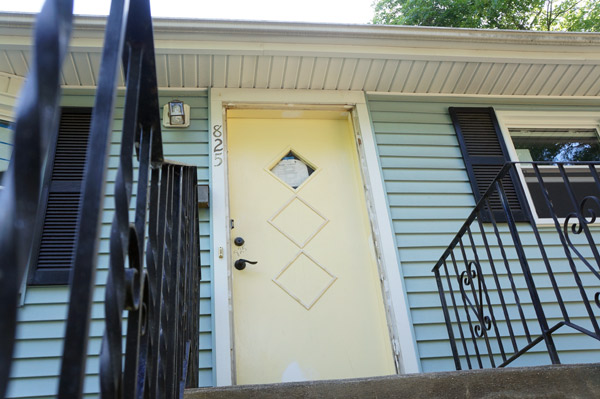
and I added trim to both the interior and exterior of the front door (which I decided to keep because $) to make it seem a bit more cool retro instead of old and dated.

w14-front-door

I also spent the good majority of my day yesterday tackling the kitchen vent and the gaping hole in the ceiling.  It went from this:
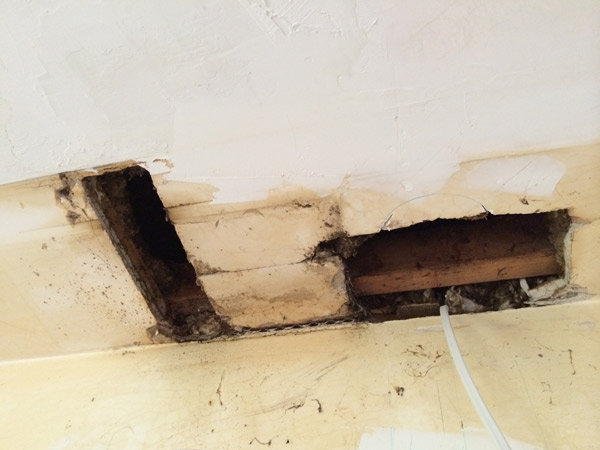
ceiling-hole

to this:

w14-kitchen-vent

I still have to sand and do a second layer of plaster over it.  With a stand alone vent hood going there, I need to make it look GOOD!

Thankfully, this house has finally turned a corner from being a disastrous construction zone, to being near completion (at least the upstairs.... we won't talk about the basement right now).  Even with my drop cloths strewn about, the view as you walk in the front door puts a smile on my face.  Light bright walls, open concept, gleaming original hard wood floors.

w14-living-room

Next steps- paint and get the kitchen installed!

2 Weeks and $1000

It's been a good few days on the flip front.  Friday, after 2 weeks of scrambling, I got Frankie all staged and ready to show off for his Saturday showing.  The Saturday showing lead to a second showing Sunday and an accepted offer!  And Hubby and I sighed a collective sigh of relief.  We've learned several expensive lessons with this house: 1- purchase price has to be right for the neighborhood.  2- the best offer is the one you have in front of you.  We would have made more profit if we took the first offer... ce la vie. and 3- staging is totally worth the time and money (plus it's fun). When faced with a non-selling house, we didn't want to sink any more money into renovations, so reluctantly we agreed that staging was the way to go.  We had resisted previously because we weren't convinced that the time and cost were worth it (spoiler alert: they are).  I may be able to envision furniture in the space, but sometimes I forget that not everyone sees a space that way.  So I gave myself the challenge- 2 weeks and $1000.

Frankie staged living room

Admittedly, it was trying to rein myself in- I wanted to design the whole space with the absolute perfect pieces!  I had to force myself to do just enough to make it feel cozy and to work with the pieces that I could get from craigslist for next to nothing.

Frankie staged living room vignette

Frankie staged mcm bedroom 1

I hung IKEA curtains in all the bedrooms using Sarah M. Dorsey's hook method and they totally helped the entire house feel finished.

Frankie staged mcm bedroom 2

Frankie staged mcm bedroom 3

Frankie staged mcm bedroom 4

If you didn't see on face book, I'm kind of madly in love with the mid century modern twin bedroom sets (yes, setS) that I found.  Eventually they'll get refinished, but the lines are dreamy and they're SOLID.  Sadly, the nightstand was missing it's original knob.  I may have to find a suitable replacement in the near future.

Frankie staged master 1

Frankie staged master 2

This dresser may end up being a future project too- polish up the knobs, repaint it (the finish is the victim of a poor refinish attempt) and add legs which apparently were there originally.

Frankie staged mcm bedroom 5

Frankie staged mcm bedroom 6

I shopped my own house for the majority of the accessories including lamps and trays.

Frankie staged mcm bedroom 7

My absolute favorite view is the view you get when walking down the hall:

Frankie staged hall view

It certainly doesn't look like a house that's lived-in, however just adding the furniture and a few strategic accessories, help to make it feel like it could be a home.

Aside from the kitchen/dining witch I had staged when we listed, I totally met my own challenge and was able to furnish and style a living room and 3 bedrooms for under $1000

Here's the cost breakdown:

Living room:

Sofa, craigslist-$50

Side chair, craigslist-$50

Rug, craigslist-$40

Lamp, already owned-$0

Side tables-$30 + spray paint

Living Room TOTAL: $170

Bedrooms:

2 twin beds, 2 dressers, 1 nightstand, craigslist-$100

Queen headboard & metal frame, craigslist-$50

2 Twin mattresses, craigslist-$50

Queen mattress, craigslist-$25

Queen split box spring, craigslist-$FREE

Nightstand, tag sale-$5 + spraypaint & new knobs

Dresser, craigslit-$30

Bedding, pillows, & accessories-$328.33

Bedrooms TOTAL: $588.33

TOTAL STAGING COST: 758.33

Grover: Week 13

I hope you enjoy these weekly updates as I learn to navigate through the business of flipping houses.  Check out more about this flip, Grover, or check out posts about our last flip HERE. I got a pleasant surprise yesterday when I got to Grover- the floors have a first coat on them!!  The only bad part of this news is that I had to try and take this week's progress shots for you while standing in the back doorway since I couldn't step on the floors.

I admittedly didn't spend a ton of time at Grover this week- the bulk of my time was spend schlepping things from Craigslist and staging Frankie for under $1000 (who's looking pretty spectacular if I do say so myself).  When I was over at Grover, I kept myself quite busy prepping the living and dining room walls and trim and starting to prime.

w13-floors2

but look at those floors!!!  The floor in the living room (the red area) is 100% original while in the dining room (bottom right of pic) new floors were woven in with the old so that the kitchen's (area on left in blue) new wood would blend.  I heart them.

w13-floors

I'm quite excited to switch out the dining room fixture for my 'new' craigslisted Restoration Hardware chandelier... of which I have no good picture of because it's in the basement and as I mentioned...I couldn't step into the house...  BUT, I found this picture on e-bay of one-size-up chandelier.  Mine only has 5 arms.

restoration hardware light

Mine's brushed nickel and doesn't have the shades.  No shades is a good thing, a very good thing- those shades make it feel traditional.  Without the shades, it looks rather mid-century like the house is and it makes me happy.  This is the high quality pic from the listing that I saved onto my phone.

rh-light

It is missing the chain and the ceiling canopy, but those parts are easy to replace and I'll take a Restoration Hardware chandelier for $50 any day!

Back inside the house, I have thankfully banished the dingy cream/yellow from the living/dining windows and it's an instant facelift!  With the yellow gone, it feels exponentially cleaner.

w13-window

Almost all of the trim in the house was the same odd cream/yellow as the front door (which, trust me, is much more garish in person.  So much so that the roofing guy who came to quote the roof mocked it).  So this is my current debate.  Do I leave the existing front door, add a little trim to make it a bit more architectural, and simply paint it?  Potential color options range from a better yellow, to green, to a deep red.

w13-original-door

Or do I switch it out entirely?

w13-hd-door

Apparently on home depot's app, you can hold up certain products and then take a pic with it in your space- I dig it.  I'd stain this door a medium tone, but keep it wood.  Hands down, I know the new door would look better, but I'm having a tough time justifying the cost of getting it installed.  The diamond door is just so dated (and not in the best shape), but I very much like getting a return on each element I put in the house and I'm not sure the ROI is there.  Thus is my internal debate.  I think I need to talk to my contractor a bit more before I can make an educated door decision.

So that is my enthralling Grover progress this week.  The staging over at Frankie is much more exciting, so I'll be taking photos of that today.  If someone doesn't want that house now they should have their heads checked!  Speaking objectively of course.