Flipping

Clark: Week 1

I think I've sufficiently shocked my body this week- going from sitting at a desk 8 hours a day to on my feet demo-ing for 8 hours a day.  I need a massage more than ever before. But, enough about me, you want to hear all about Clark!  We closed on him a week ago yesterday and I've been out at the house almost every day since.  I took some updated pictures right before I left last night, so here's how he currently stands.  (To see what he looked like before the demo, check it out here)

The biggest change so far has been in the kitchen.  Or should I say "what kitchen?"

Kitchen gut progress1

Notice the closet bump-out that used to be in the right corner is now gone- yay!  Now we'll have room for a normal size fridge and dishwasher.

Guess what else is happening on that wall:

living room gut2

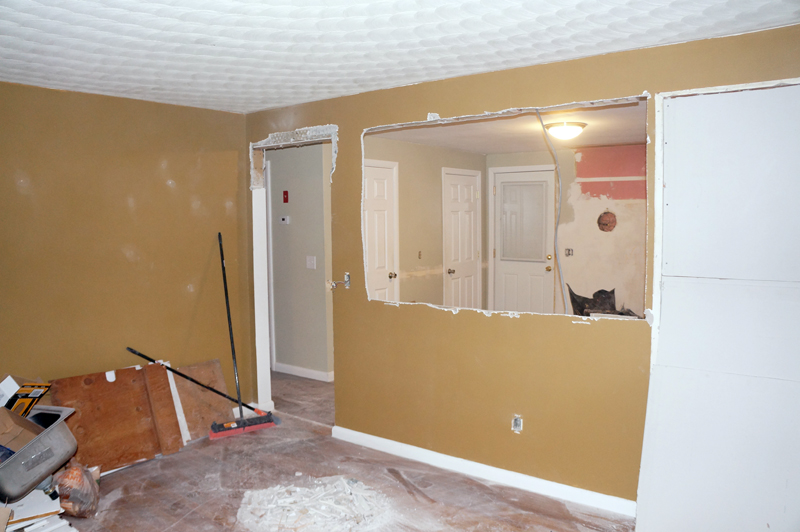
It makes the space feel so much larger- a HUGE plus on a house under 1000sf.  Our realtor suggested this and she was totally right (thanks Amy!).  The contractor's going to be back this afternoon to finish the openings.

living room gut1

The demo pile has been hanging out in the living room for now.  We got a bagster, but parking's limited, so I didn't want a dumpster or bagster taking up my spot.  Next week I'll put it out when I call for a pickup.  Once I cut down most of these boards, I'm hoping we can fit almost all of it in the bagster (it can hold up to 3300 lbs!).  I'm keeping my fingers crossed.

The Habitat for Humanity ReStore that's a few minutes away is going to get a ton of stuff from Clark including the kitchen sink and whatever other usable fixtures I remove.  I also plan on sourcing as much as possible from the ReStore as well, so it's a win-win in my opinion.  I already found one treasure there.

restore fixture

I'm going to be spraying the metal parts silver, but for $5 plus tax I couldn't resist.  This guy's going to look AWESOME hanging over the kitchen sink!

BUT, the kitchen/living room isn't the only area that's undergone a transformation!  Just a few hours after the closing, Hubby and I got to work on the bathroom.

bathroom demo

When we started pulling down the cracked plastic shower surround, we discovered delightful pink plastic marbled tile underneath.  It entertained me, so I rescued a few undamaged pieces for posterity.

bathroom gut progress3

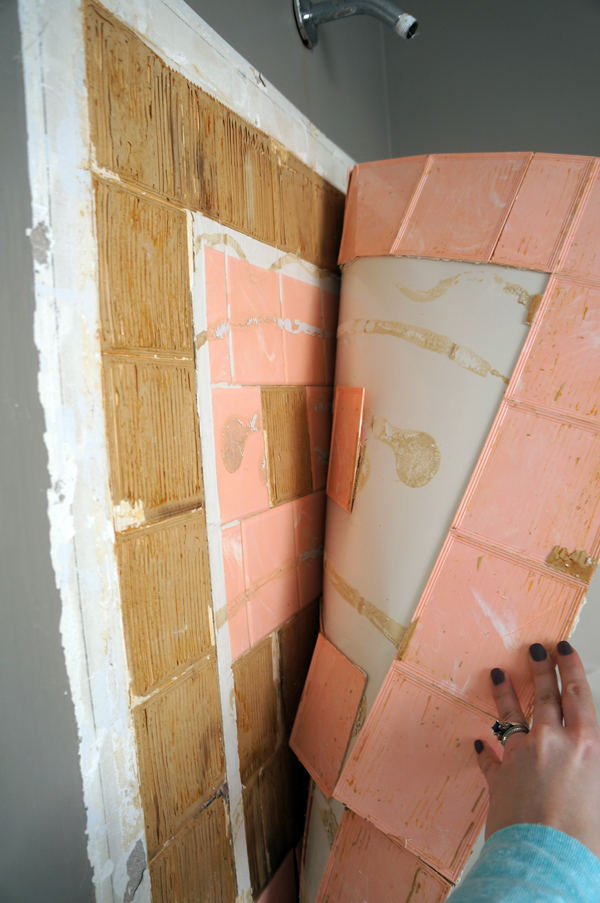
All week, I've literally been chipping away at the bathroom piece by piece.

bathroom gut progress1

bathroom gut progress2

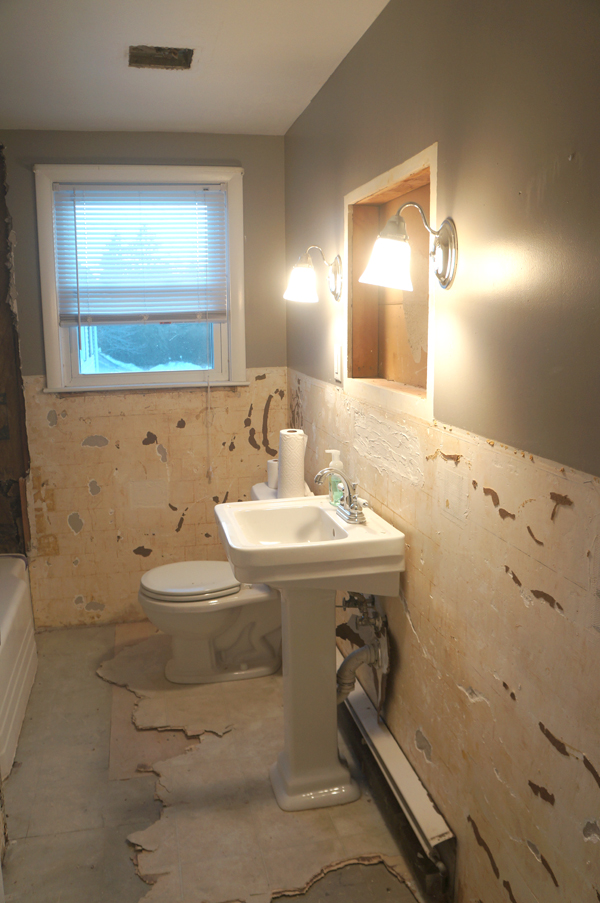
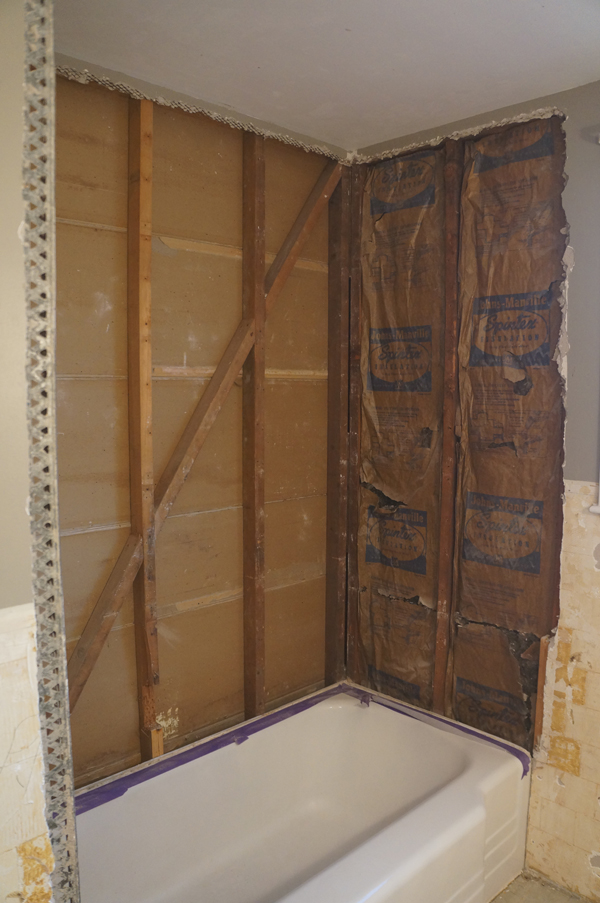
I wish I could express to you the smell when I started opening up walls and demoing cabinets.  Like I said before, he LOOKED decent in pictures, but nothing was nice.  Nothing.  There was mold in the shower walls and water damage under the kitchen sink, and 50+ years of grime.  Yummy.  Everything needed to go, so it went.  I'm really excited for the rebuilding part.  That's the part that makes this designer giddy.  I'm planning to add back some vintage charm through finishes and really give him character.  That's what's going to sell it.  (I'll put together a mood board next week to show you my plans)

Although this past week was mainly demo, it wasn't exclusive.  We also:

  • had several small plumbing issues fixed (by a plumber, I'm not brave enough to give that a try)
  • With the help of my mom, we scraped the peeling paint off of all the basement walls to prep for a new coat (I know I haven't shown you the basement yet- its a basement, nothing special)
  • Started prepping walls throughout the house for paint
  • Got several quotes on tile work and hard wood floors (yup, hardwood- I'm excited!)
  • Made many many trips to Home Depot (and anticipate many many more)

I'm hoping that we can finalize any last demo today and tomorrow and next week can start the rebuilding phase.

How's that for a weeks worth of progress?

Busy Bee

Construction workers must be in awesome shape- demo is TIRING!  The good news is that the demo is almost done in the kitchen and bath.  Demo-ing everything AND the kitchen sink. demo sink

I've been trying to figure out how to chronicle this project for you guys without turning this blog into one all about the flip.  I've come up with the answer.  I'm going to give you weekly updates (I'm thinking on Thursdays or Fridays, any preference?) of everything that we did in the past week.  If I have a specific DIY project that I'm tackling, I'll share that with you on another day.  So instead of talking about Clark everyday, you'll get an average of 2 flip posts a week.  I can't wait to show you what's happened in the past week!!

In addition to my blood and sweat at Clark (no tears yet, and I hope to keep it that way) I've been chipping away at a few things here in our home... cuz apparently one ginormous project still isn't enough for me, I have to do several little projects at the same time.  That's just how I roll.

Remember how I VOWED to have dining room curtains before we dove into flipping?  We'll I didn't get them up before we closed, but they went up over the weekend.

curtain closeup

dining curtains

The curtains are these from IKEA and the mercury glass finial curtain rods are these from Target.

I still have a nagging feeling that something's not right in this room.  My gut says the table.  I can totally see a lighter, rectangle farmers table or butcher block table.  Hubby's gut thinks my gut is wrong and doesn't want a new table.  When will his gut learn that my gut has a better eye for design than his?  In addition to the table, I need to finish refinishing my chair collection in the basement.  These 2 that I refinished are the curvier ones and this room needs some rectilinear shapes for balance.  I also have a plan for new art for between the windows, so stay tuned for that.

Are you guys able to focus on one project?  Please tell me I'm not the only one with design ADD.

Meet Clark

Yes, I named my flip house.  Wouldn't you?  After weeks of referring to him as "The flip house" which felt weird, I decided that I'd name him after his street. Meet Clark.  (WARNING: lots of pics ahead!)

clark before ext1

Clark before ext2

Clark looks decent on the surface, but the closer you look, the crappier he gets.  He was the victim of a VERY bad attempt at a flip which is probably the reason he was a foreclosure.  When you're flipping, you obviously want to do things on the cheap.  You do not, however want to cut corners and have it LOOK like you did it on the cheap.  Now I have to undo all the bad and make him awesome.  Challenge accepted!

He's a 3 bedroom, 1 bath charmer (or soon-to-be charmer) and needs a complete kitchen and bath gut.  Luckily, the rest of the rooms mostly need patching and painting.  Lots of painting.  Every surface- walls, ceilings, trims, closets....

The Living Room:

clark before living1

Looks decent on the surface, but the walls need lots of patching and painting.

Clark before living2

The original hardwood in this room needs a bit of love (read: complete refinishing).  I'm going to attempt this project with my own 2 hands, although a few things need to happen first.  Like opening up the wall between the kitchen and living room (the one with the arched doorway).  When I'm done with this room, Clark'll charm your pants off when you open the front door.

Clark before floors1

The Kitchen:

Clark before kitchen1

A good size but dark and dingy.  No room for a full-size fridge or a dishwasher- both a necessity for a happy home (in my humble opinion).  The bump-out on the right is the living room's coat closet.  Say buh-bye, cuz it's totally going away to make room for a better kitchen layout.

This is the aforementioned wall that will soon offer a pass-through to the living room, allowing for more light and better sight lines.

Clark before kitchen2

The previous bad flipper painted the lower cabinets to make them look better, but it was like putting lipstick on a pig.  Still a pig.  And pigs don't make for nice kitchens.

Clark before kitchen3

Neither do peel and stick tiles.  Vinyl peel and stick over green VCT (vinyl composition tiles).  YUM.  We're awaiting the results of our asbestos test to see if the VCT needs to stay (but be covered) or if we can rip it out. (I'm crossing my fingers we can rip it out with vengeance!)

Clark before floor2

The Bathroom:

This room is the most deceiving.  Looks rather nice/unoffensive in pictures.  Looks dreadful in person.  Only the sink and tub are slated to stay.

Clark before bathroom1

Linoleum that's molding from below= lovely.

Clark before bathroom4

Don't let your eyes deceive you- this it NOT tile.  This is chipboard molded to look like tile.  Cheap tile with visible finish nails everywhere...

Clark before bathroom3

Now that we've gotten through the worst of it, the bedrooms are a walk in the park.  They all have newish carpeting in a neutral color that needs a quick clean and just need lots of paint and new lights to make them sparkle.

Bedroom #1:

Clark before redbed1

Bedroom #2:

Clark before graybed1

Like I said, lots of paint in the bedrooms.

Clark before graybed2

Master Bedroom:

Clark before master1

I didn't get any images of the backyard yet, since it's covered in snow.  When the snow melts more, I'll take some befores of that too.  Its a quaint backyard that needs weed-whackers and cleanup.

I'm really excited to start the transformations and get Clark back on the market.  The goal is to get him done and listed in under 2 months.

Full steam ahead!!!