Before & After

Shorty the Flip House: Living Spaces Reveal

I hope you enjoy these weekly updates as I navigate through the business of flipping houses one house at a time!!  Come back every Friday to see how this house, aka Shorty, progresses from week to week.  To catch up on the progress on Shorty, check out his previous posts here.  If you’re new here, (Hello!!!) you can find more about my 5 previous flip houses here.  Thanks for coming along for the ride!!  

For those here in MA, happy Patriots Day/ Marathon Monday! #BOSTONSTRONG!  No matter where you are, happy Reveal Week!!!  I've got treats for you every day this week, leading up to the kitchen reveal on Friday which is pretty much going to blow your socks off.  Today, I have the downstairs living spaces to show you.  Even though I teased you with the pic on Friday, I'll start at the very beginning again- the front porch:


If that picture doesn't refresh your memory, we cleaned out 4 20yd dumpsters of stuff out of the house before we could really dig in.


From there, I invite you into the entryway- the before pic on the left is from post clean-out, but before any real work was done.  The after pic on the right isn't a drastic change, but just a refresh of this little space.


From there, let's step into the dining room to the left of the entryway.


No major repairs were done in the dining room- primarily plaster repair, trim replacement, floor refinishing, and paint.


The living room transformation is a bit more stunning.


The fireplace got a few quick refreshes that make such a huge difference.  The brick got painted white and I installed a craigslisted doors/screen.  I actually picked up the fireplace doors about an hour before our plans started to change for Copper Dot Baby 2.5 weeks ago.


To avoid one crazy crazy long post, I'm breaking Shorty's reveals into a full week, so stay tuned all week!!

Tuesday: Bedrooms

Wednesday: Bathrooms

Thursday: Exterior

Friday: Saving the BEST for last-  Kitchen!!

Save

Save

Save

Save

Save

Save

Save

Swap: Eclectic Tray

Let's Swap it Like it's HOT! swap

No matter how much I try to plan, Swap Day always seems to creep up on me!  Confused about what I'm talking about?  Swap it Like it's Hot is a fun thrift/diy swap between a bunch of amazing bloggers.  We head to the thrift store with a budget of around $10 and then we send our finds to someone else for them to re-envision, transform, DIY, or generally make awesome.  This is my 4th time participating in this diy extravaganza organized by Charlotte of Ciburbanity.  Check out my previous Swap It projects: Dipped Art & Plant Holder, Rustic Lamp, & Book Planter.

This time around, I was sent thrifted goodies from Erin Spain and I have to admit, she had me pretty stumped for a bit!  She sent me a basket with ducks on it, a "wood" plaque, a white pot, and 2 small metal trays.  For quite a while I was trying to figure out how I could transform, combine, or reinvent one or more of these pieces.


swap-it-before


Finally an idea clicked so I decided to give it a shot!  I left the ducks out of this project- maybe I'll paint the basket in the future, but not today... Sorry ducks!!  My plan was to combine the trays, plaque and planter into one collage of a tray.  Not the most remarkable reuse, but I think the pieces ended up looking a bit better in the end!


swap-it-parts-before


I started by taking the tab off the top of the wood plaque (which was sadly laminate, not a real wood that I could stain), and taking the handles off of both little trays.  I covered it with blue tape so that I could mark where I needed to drill- 4 holes on each side for 2 sets of handles and a 4" hole for the plant pot to sit in.


swap-it-drill-holes-marked


After all the holes were in place, I quickly sanded the surface with a high grit sandpaper, and wiped it down with a sander/deglosser.  Then came spray primer and paint!


swap-it-paint


And let me assure you, everything was done with the proper safety precautions.  I'm not getting this kid high on spray paint fumes!

After the paint was dry, I used super glue in the small holes to affix the handles in place, and added felt pads to the bottom.


swap-it-eclectic-tray


I admit, this isn't my favorite swap result of all time, but I am pleased with the way the double brass handles look on the silver sprayed tray.  It would be totally cute on a night stand holding a glass of water and chapstick, or on a coffee table to help corral remote controls, don't you think?


swap-it-eclectic-tray2


Now please run, don't walk, and check out what Amanda at Prim and Propah did with the goodies that I sent her!  What would you create with these items?


swap-it-sent


The fun's not over yet!  Check out all the AMAZING transformations that have been happening ALL WEEK!  I haven't had a chance to check them all out myself yet, but the ones that I have will blow you away!!


Save

MONDAY

Ciburbanity

Windgate Lane

Vin'yet Etc.

Casa Watkins Living

One Mile Home Style

TUESDAY

Reinvented

ConfettiStyle

Confessions of a Serial Do-It-Yourselfer

Addicted 2 DIY

Restoration Redoux

I Am a Homemaker

Maggie Overby Studios

PMQ For Two

WEDNESDAY

Two Thirty-Five Designs

58 Water Street

Create & Babble

Dogs Don't Eat Pizza

Gourley Girl and Guy

The Charming Farmer

THURSDAY

This is our Bliss

Southern State of Mind

Two Purple Couches

My Life From Home

FRIDAY

Erin Spain

Copper Dot Interiors

Prim and Propah

Sweet Tea Refinishing

Eveys Creations

On Fern Avenue

Save

Save

Save

Save

Save

DanceFit Reveal!

A few months ago, I introduced you to DanceFit Studio and the new location that we were giving a facelift to.  Well, I'm pleased to say that the new studio has been up and running for about a month and a half and we finally were able to have a photoshoot and get some sweet pictures to share with you!  I'll give you a minute to pop back to my post about the design plans, so you can see what the ideas were for the space.  Now go ahead and tell me that you wouldn't want to take fitness classes here or be a little kid on your tippy toes at ballet class...  

DanceFit Studio Reveal - Mirrors and Windows


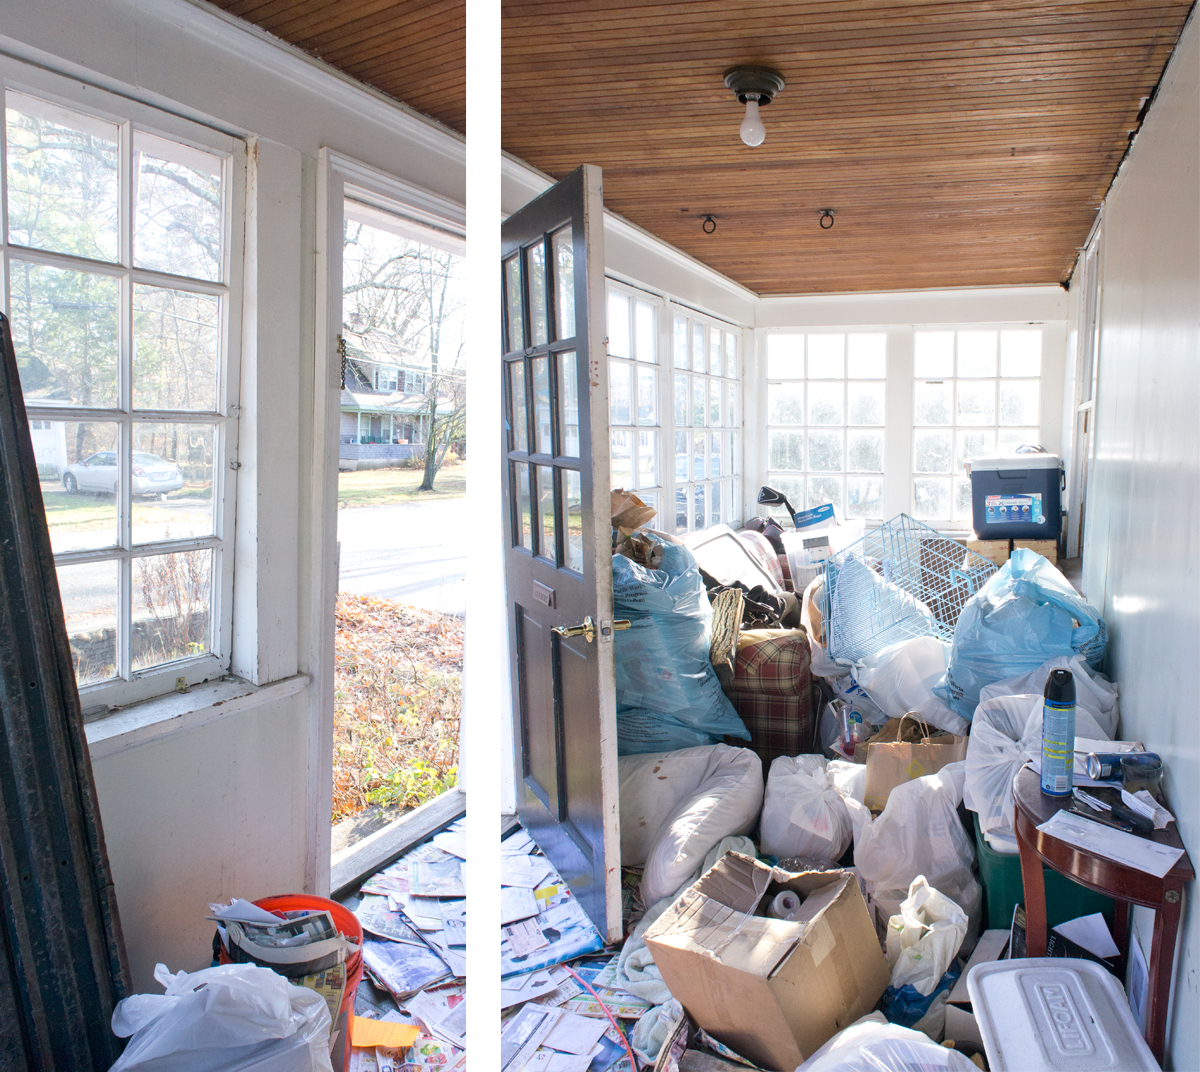
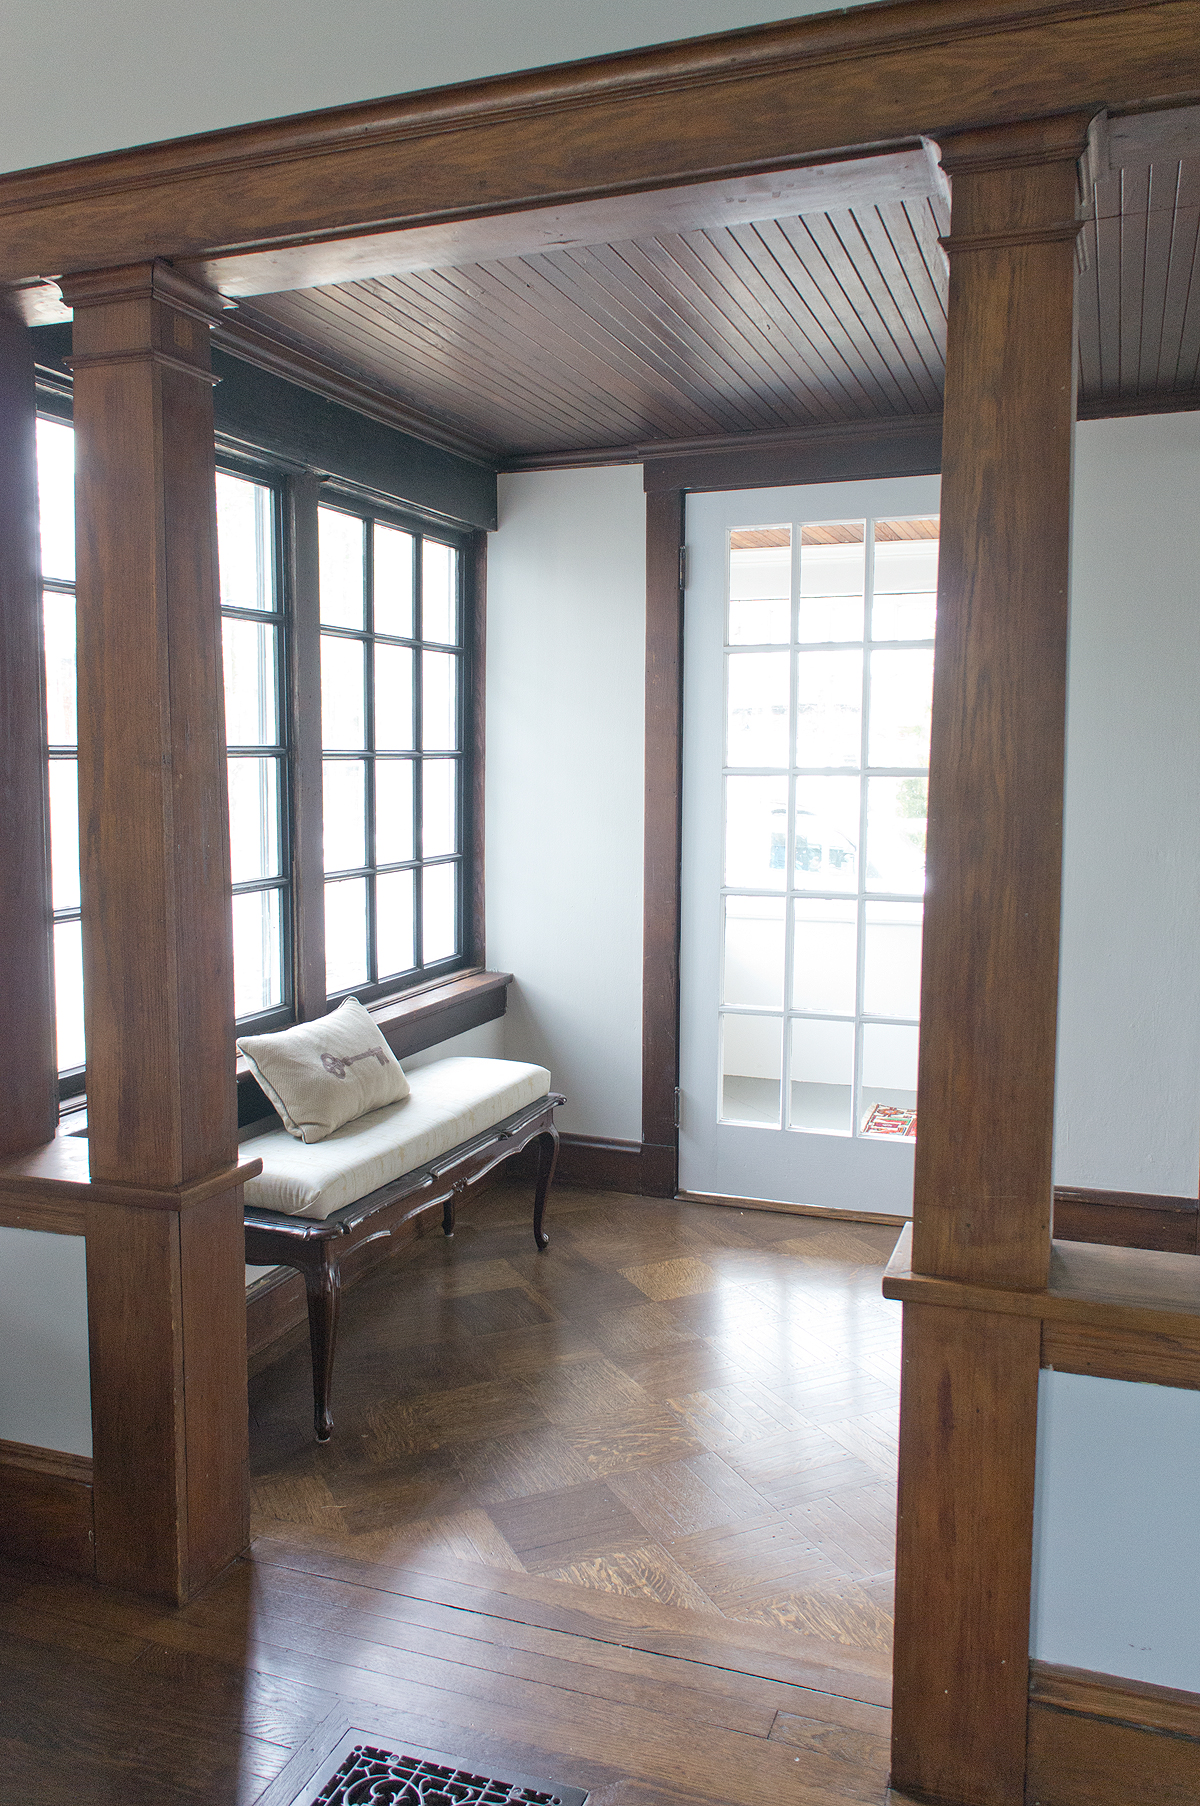
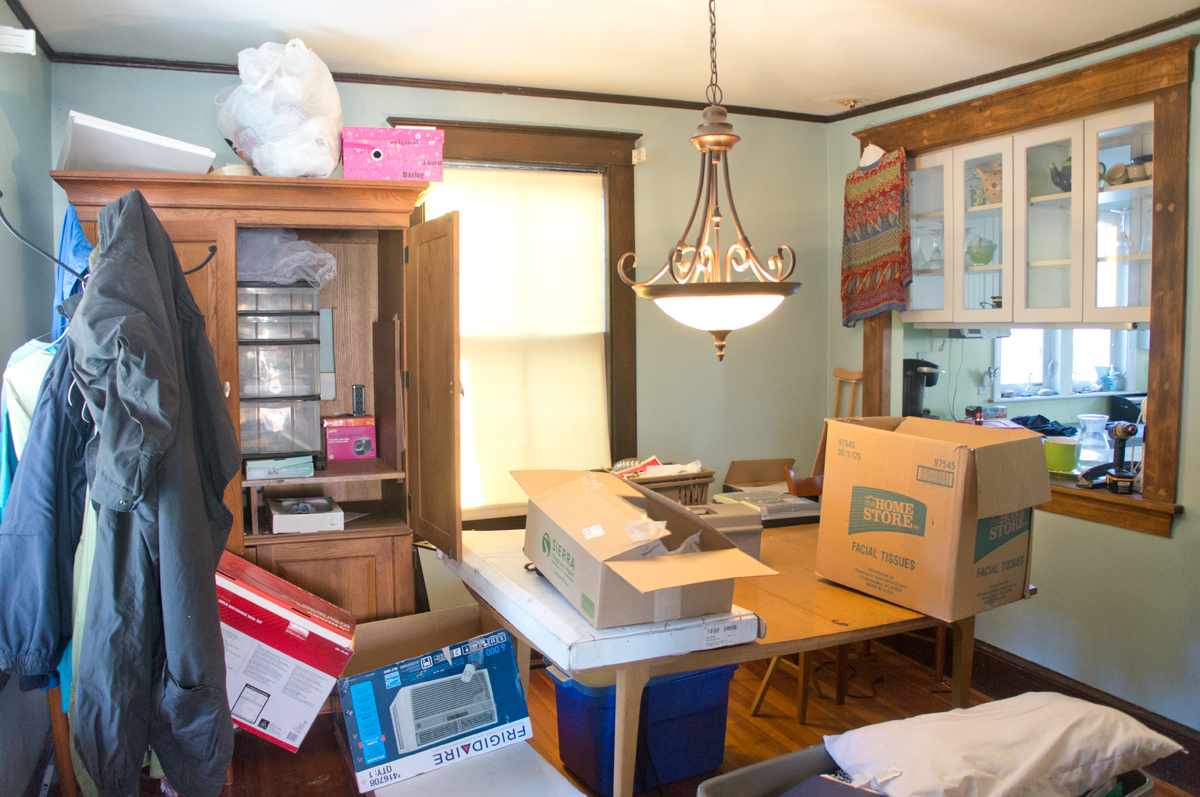
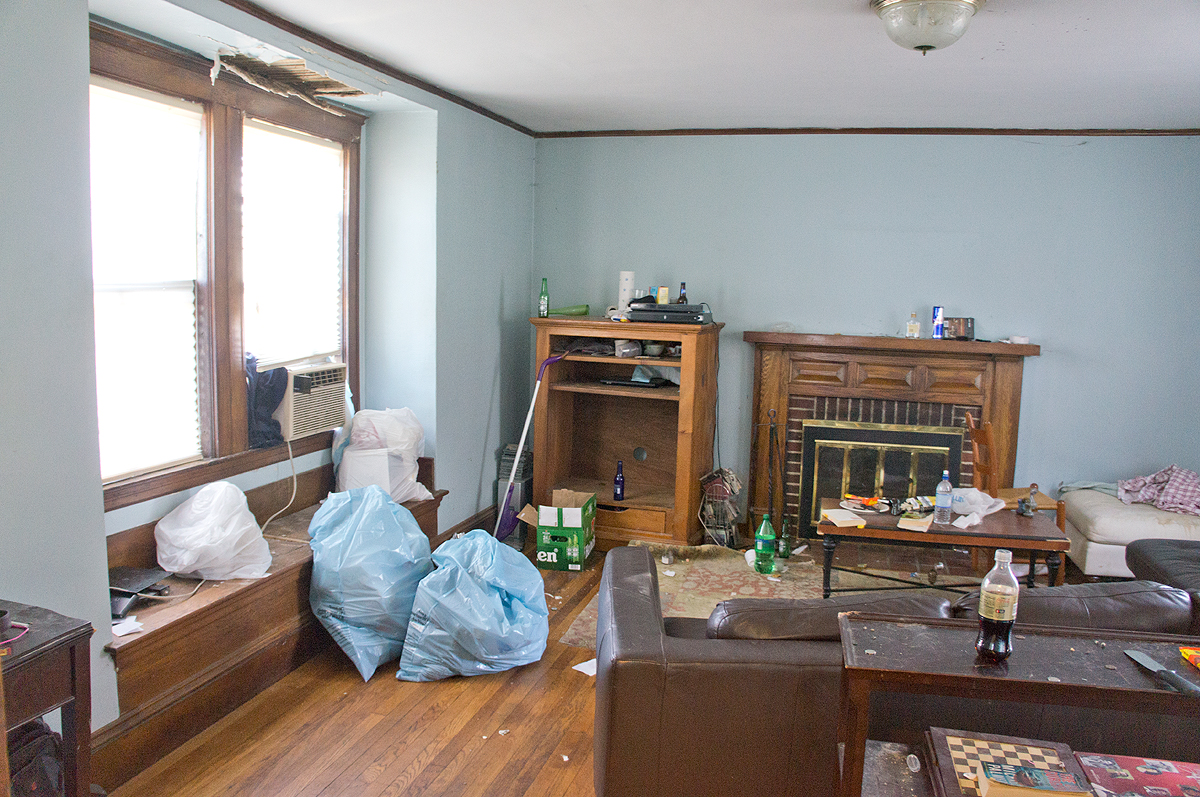
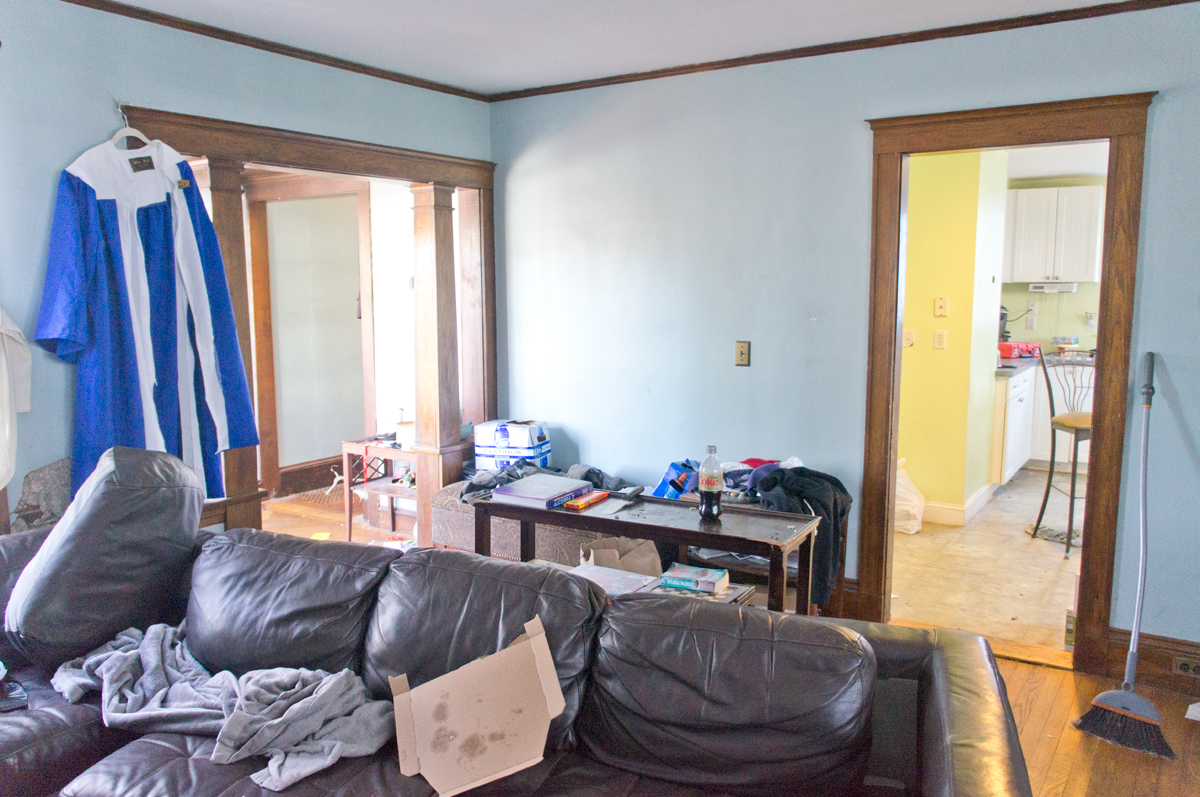
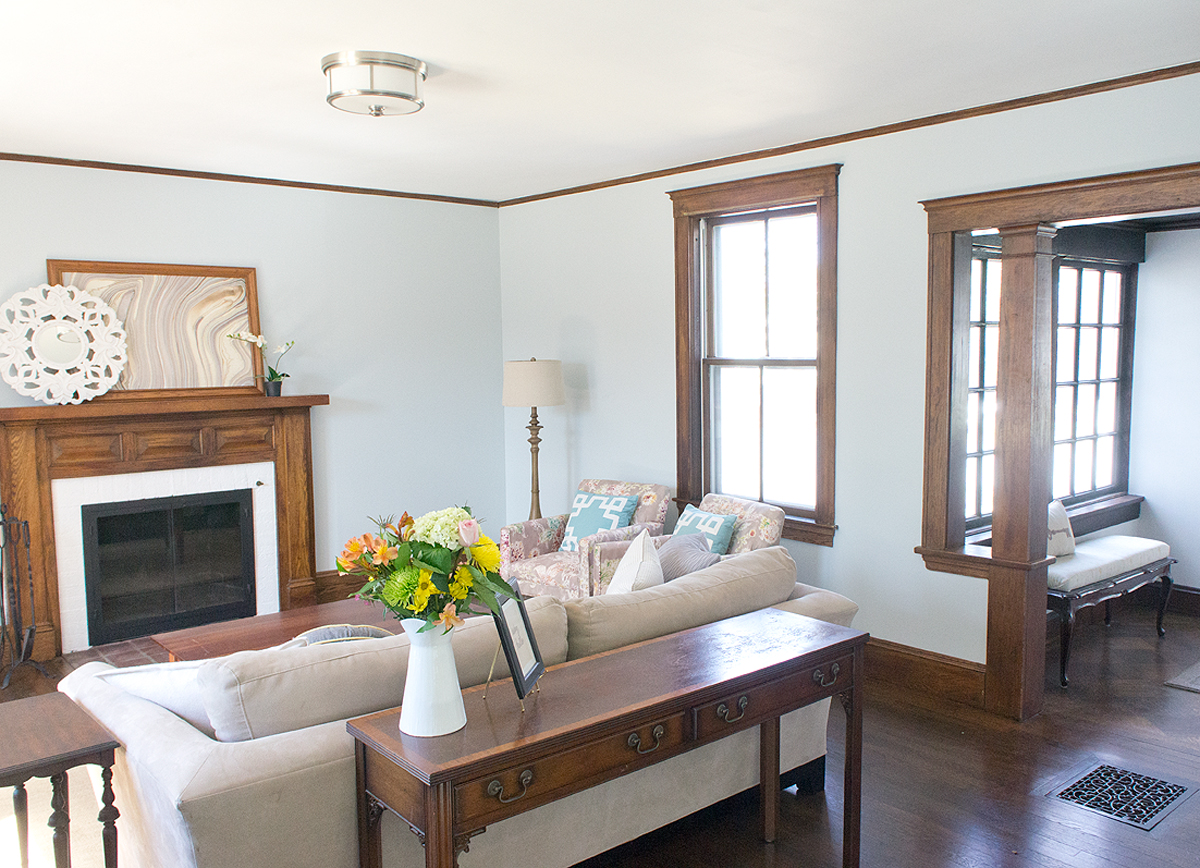
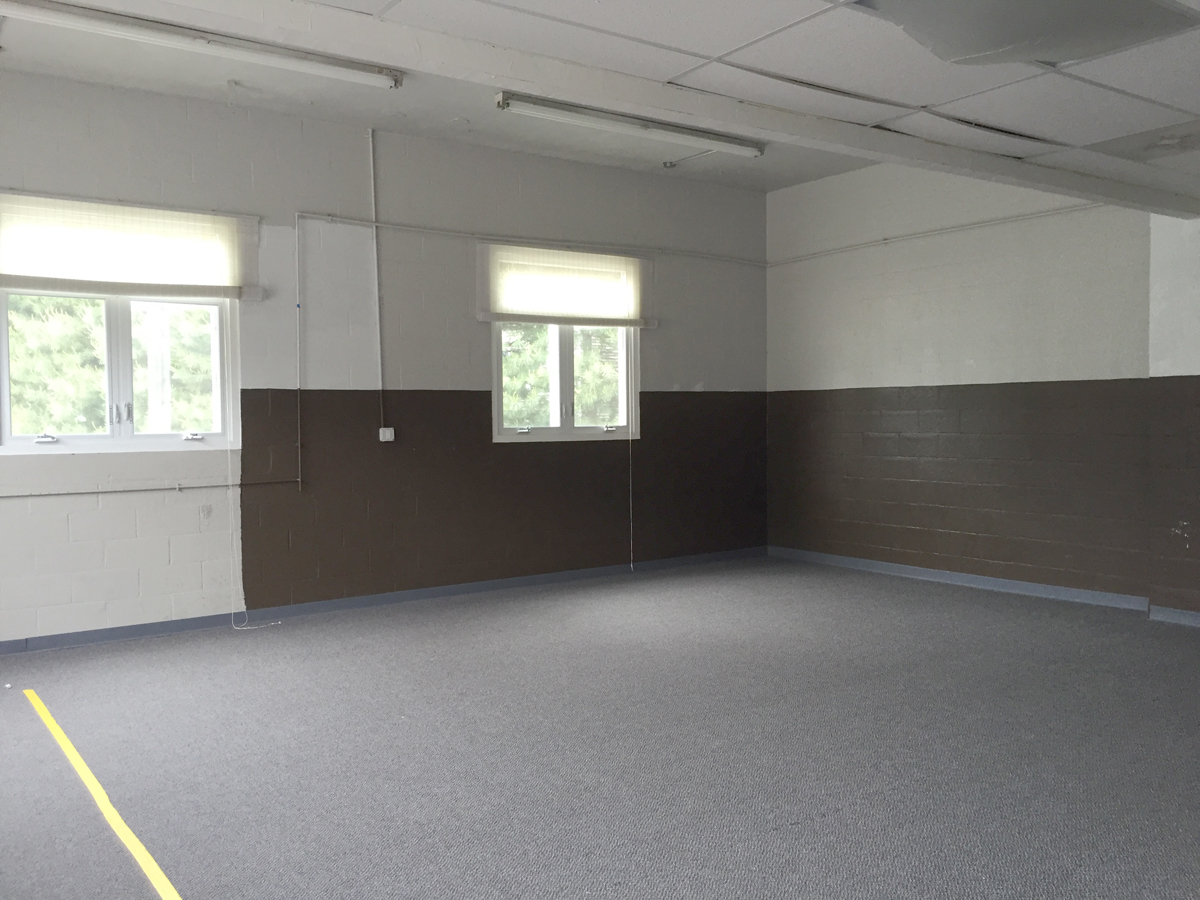
It was pretty far from this to start with.  It was originally an auto garage that had been converted into a karate studio with the worst colors and stained carpeting that you could pretty much imagine.  Trust me when I say that carpet was much worse in person.


DanceFit Studio Before DanceFit Studio Lobby Before


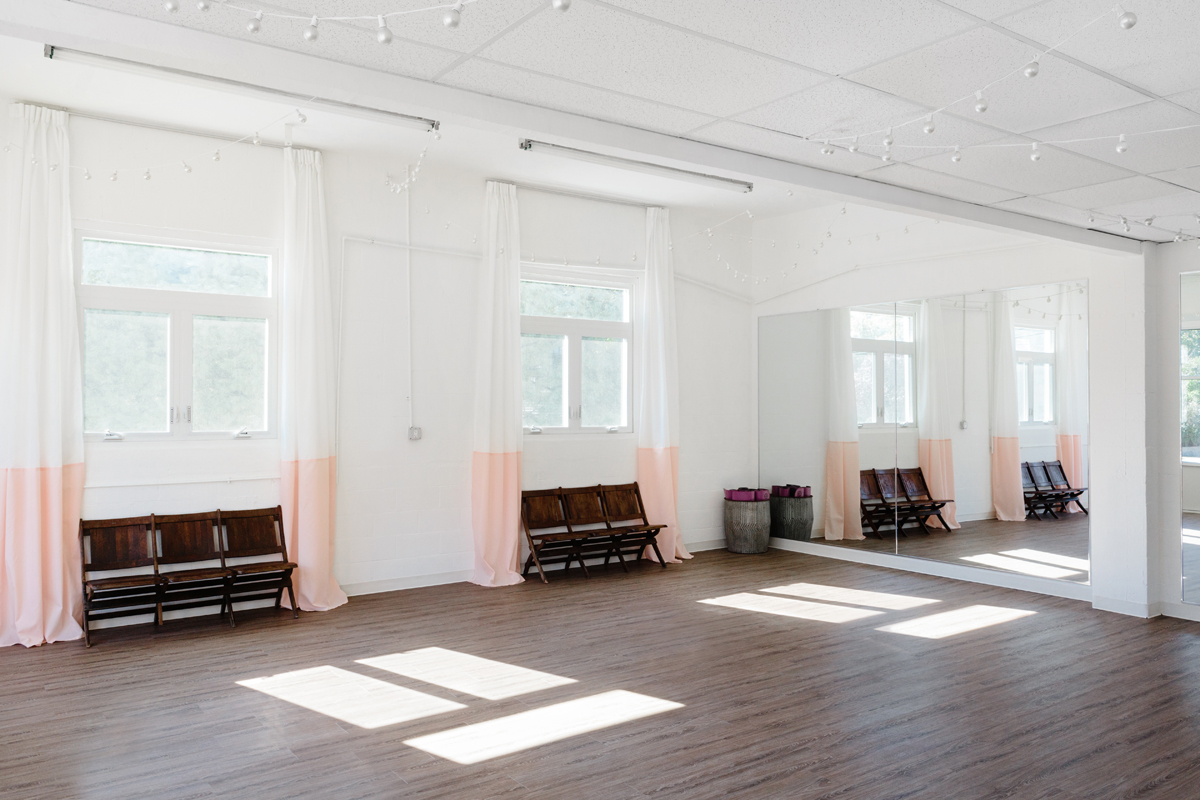
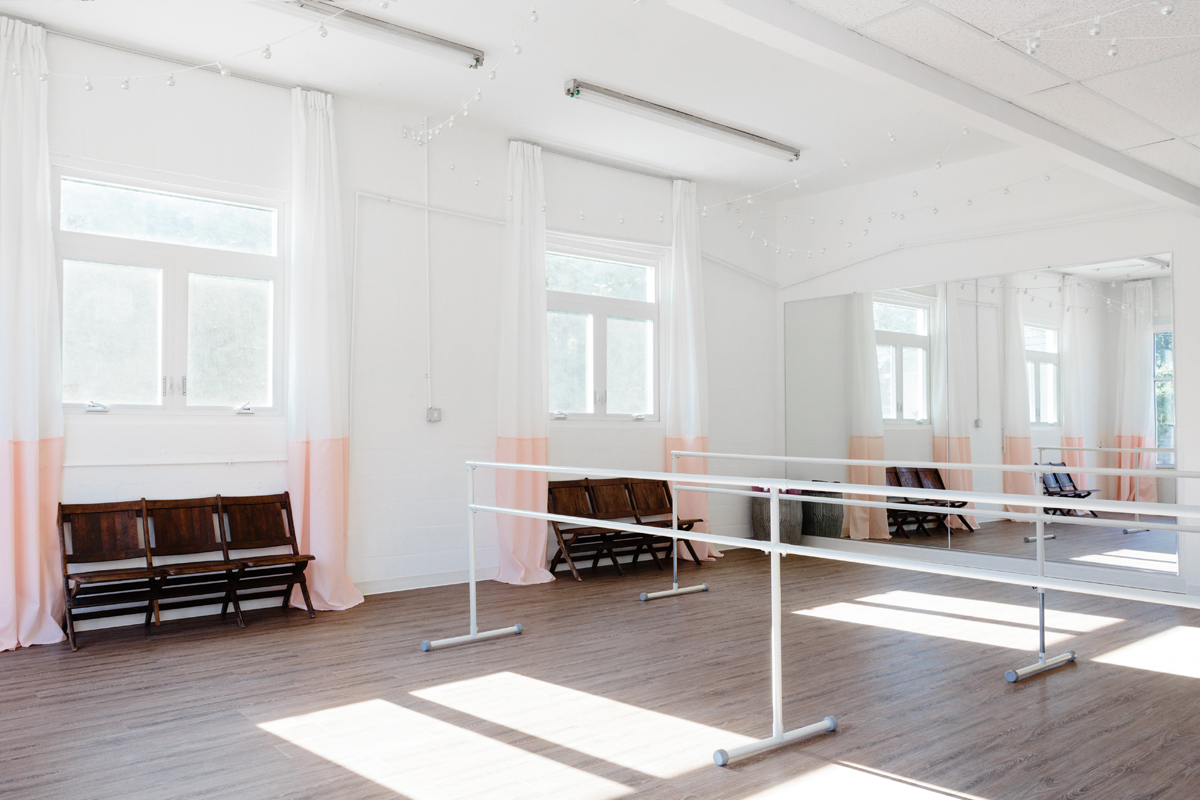
We were working within a budget so we made sure that the first things we spent on were the floor and the mirrors since those make the most impact in a dance studio.  From there, it was about making things functional and adding a touch of glamour throughout.  My personal favorite view, and what seems to be the general consensus's favorite view as well, is these vintage theater chairs with floor to ceiling curtains.  I found the chairs at a local vintage shop and used IKEA curtains sewn together to create color-blocked curtains that were tall enough for the 12 foot+ ceilings.


DanceFit Studio Reveal - Windows, curtains, and vintage chairs


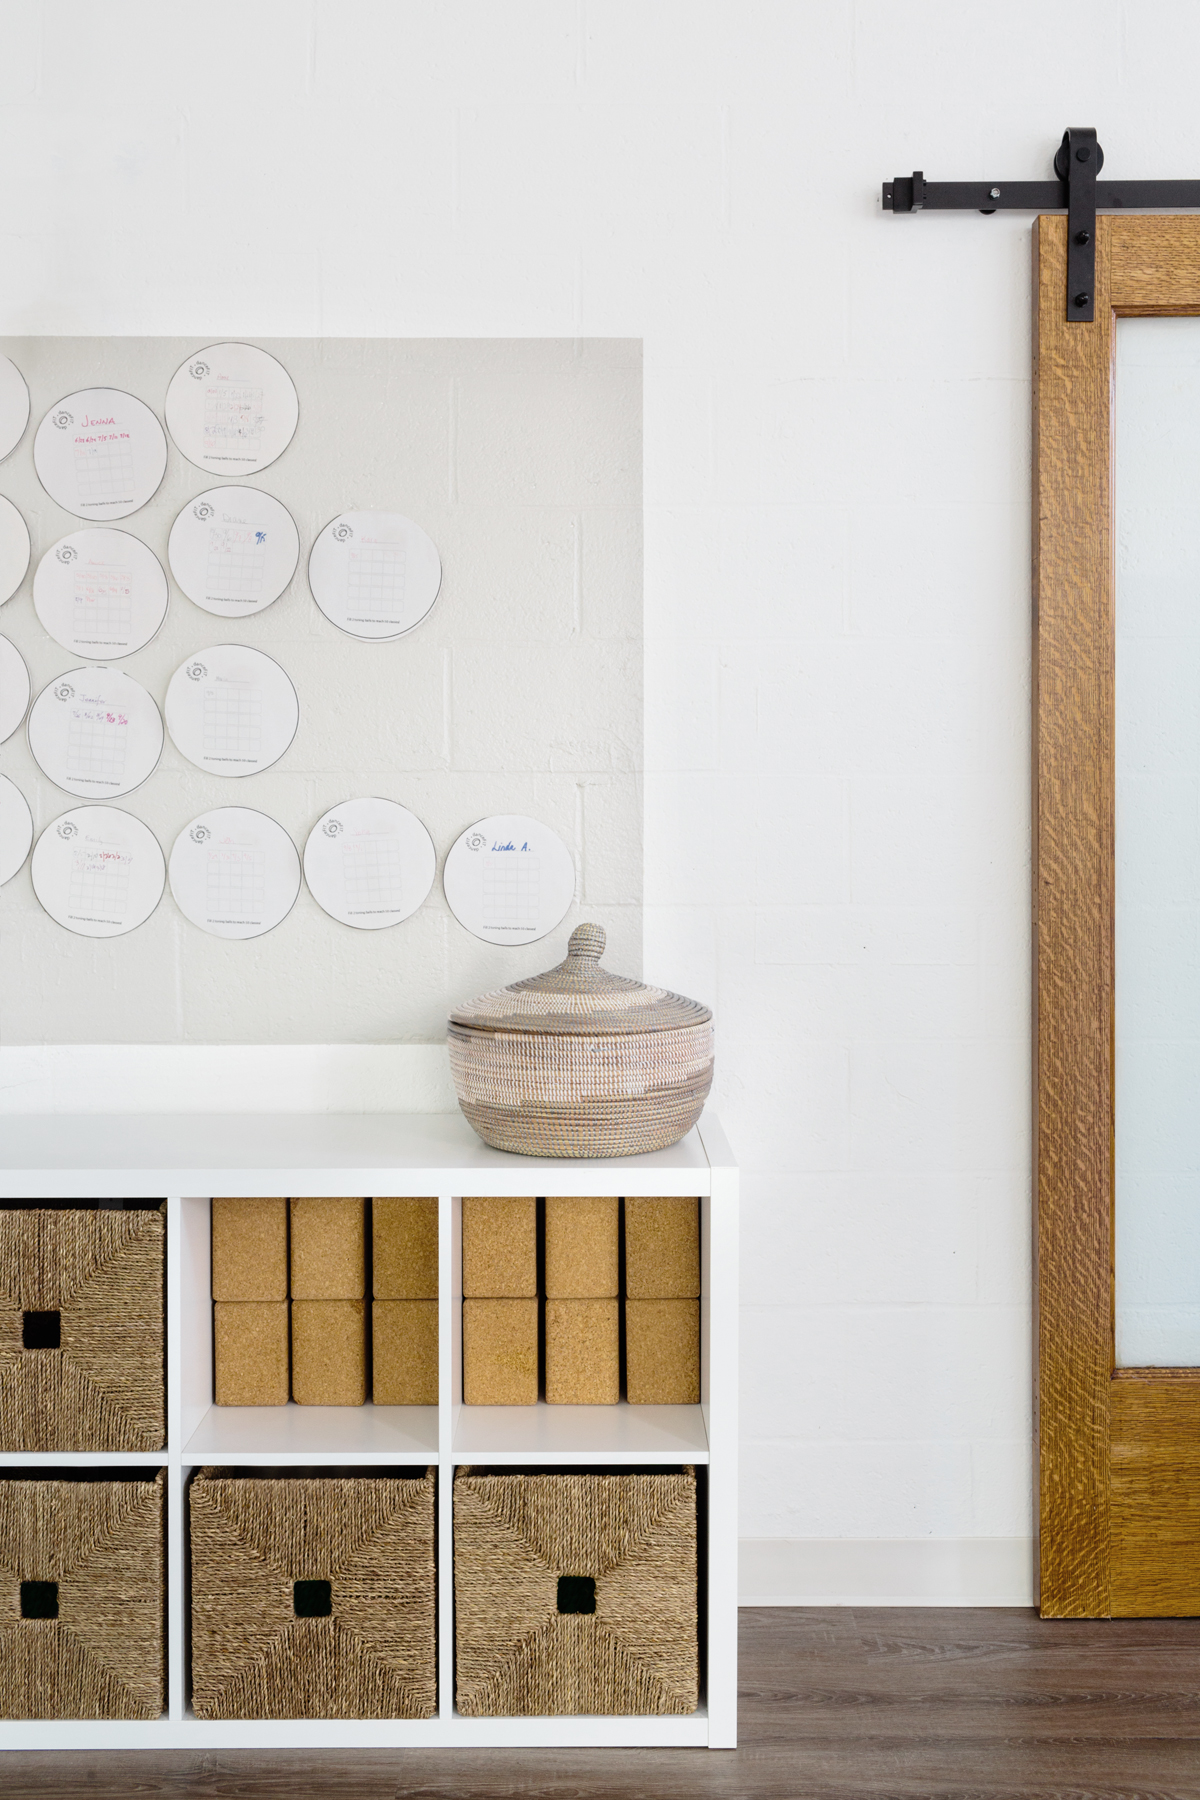
On the other side of the room we got creative with storage, using IKEA's Kallax cubbies to house most of the small fitness equipment including hand weights, yoga blocks, stretching bands, and pound sticks as well as supplies for the kids classes.  Using a light gray box painted on the wall, we were able to give designated area for client achievements and tracking classes.  They offer some fun incentives for reaching class number milestones- I'm only one class away from 50 classes this year and earning my sparkly headband! #littlewins


DanceFit Studio Reveal- fitness organization


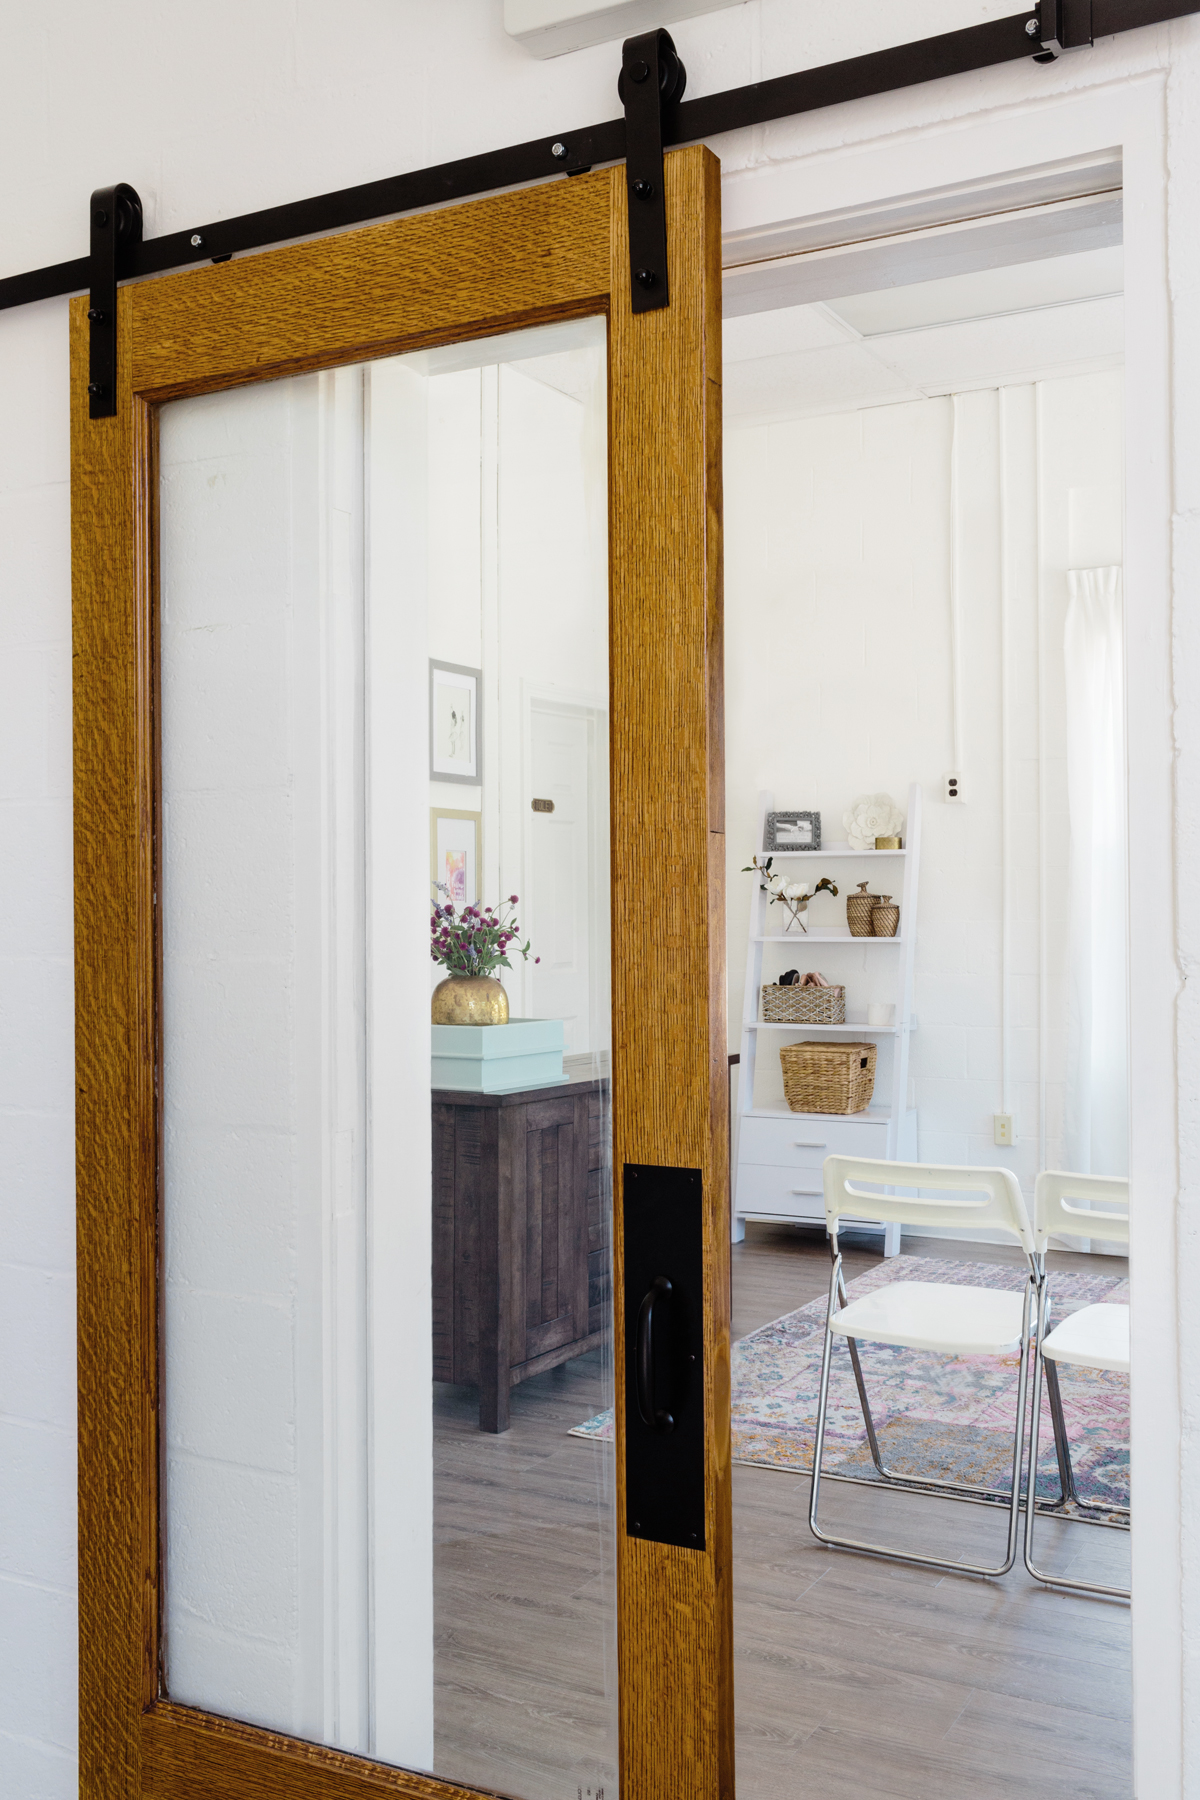
In between the studio and lobby, we installed a glass sliding door to give a little bit of privacy to the studio while still allowing parents to watch the pirouettes of their little ones.


DanceFit Studio Reveal Viewing door between studio and lobby


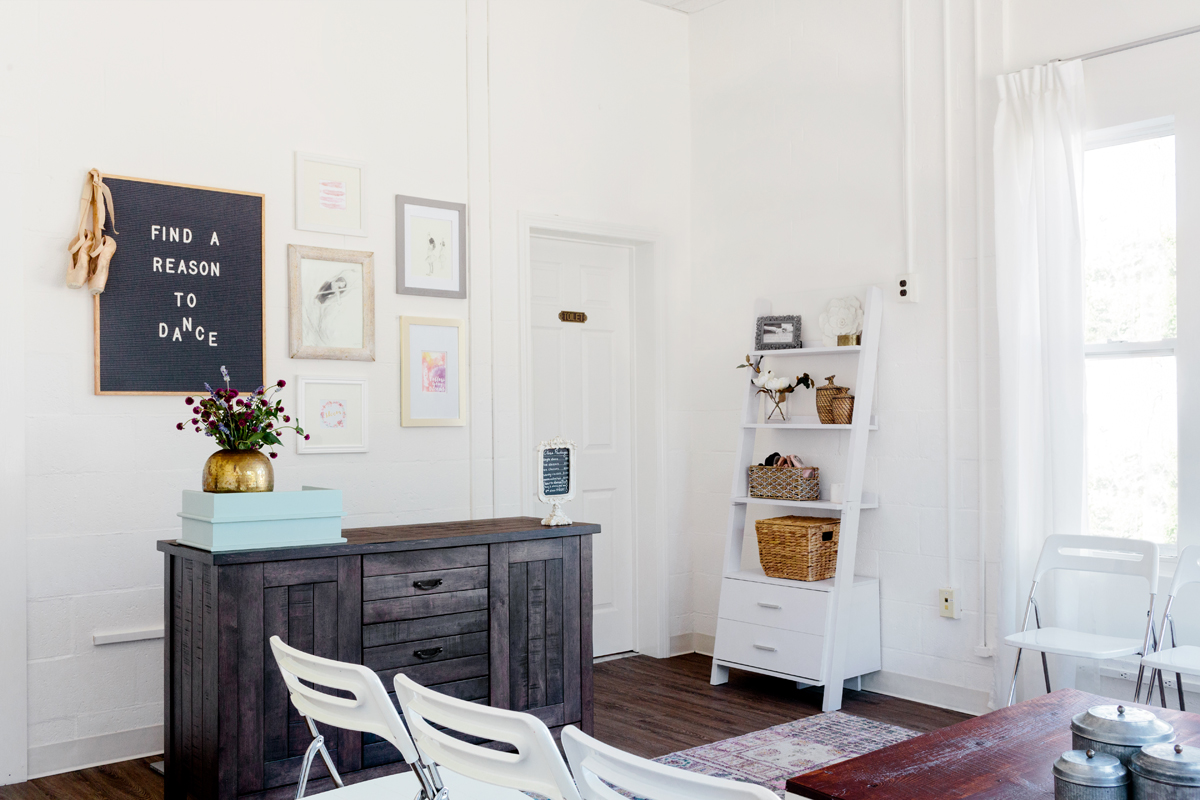
The lobby sets the tone for the space once you enter with an eclectic, but relaxed vibe.  Function was key in this entire project and the lobby was no different.  It needed to accommodate waiting parents, kids coloring at the large coffee table, and be flexible enough to be moved around for birthday parties or other events.  I'm so glad Gina, DanceFit's owner fell as much in love with the Letterboard as I did.  She needed a place to make announcements about pop up classes, special events, and general studio goings on.  I swear, every time I come in, she's switched it up already- I've created a monster.  Well, I guess I awoke the monster in myself too, because after seeing this stellar board in person, I just knew I need to get one for myself (did you see it in yesterday's big announcement post??)


DanceFit Studio Reveal lobby


Check out DanceFit's website for their full list of adult fitness classes, virtual online classes, and kids dance classes.  I personally recommend the BalletFit, Zumba, Pilates and Pound!  See you at the barre!


DanceFit Studio Reveal - Mirrors and Windows and Barres

Photos taken by the talented Joyelle West Photography.

Disclaimer: some sources below may contain affiliate links.  Shopping through these links will be at no additional cost to you, however will help support my design addiction so I can keep sharing it with you. XOXO

Sources:

Lobby- desk from World Market, sign board from Letterfolk, shelves from Wayfair, folding chairs from IKEA, rug from RugsUSA, Curtains from IKEA, & custom coffee table by Mauricio Woodworking

Studio- vinyl flooring from Lumber Liquidators, vintage theater chairs from Robject's D'art, curtains from IKEA (sewed together for color-blocked effect), yoga mat basket from World Market, fitness storage from IKEA, barn door hardware from Amazon, & salvaged door from Habitat for Humanity ReStore Worcester

Save

Save

Save

Save

Save

Save

Save

Save

Save