A Numbered Statement

After several weeks of being numberless and confusing a delivery guy or 2, Millie once again is identifiable. Craftsman bungalow wood backed house number DIY via Year of Serendipity

After the painting finished up, I knew I needed to add a bit of a warmer touch to the house.  I debated putting shutters back, but ultimately decided that beefing up new house numbers would totally do the trick.  I love high impact projects for low wallet impact.

The font and the newly curb appealed terrace side both got numbers for less than $20 a piece.

Craftsman bungalow wood backed house number DIY via Year of Serendipity

It all started with $6 Home Depot numbers, a piece of 1/2" poplar, and some stain.
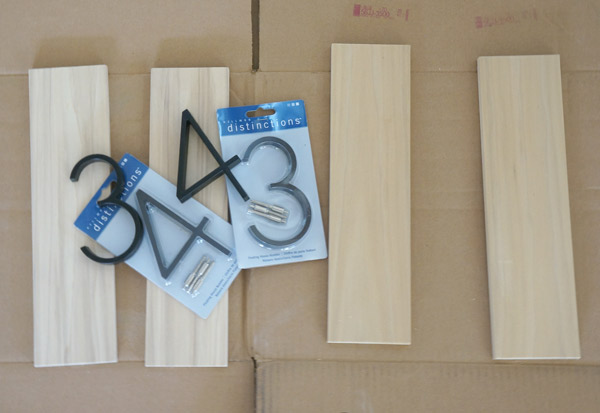
DIY wood backed house number supplies via Year of Serendipity

I laid out the numbers to determine the size of the wood and cut 4 equal pieces- each house number backer would be 2 boards side by side.
DIY-house-number-stain

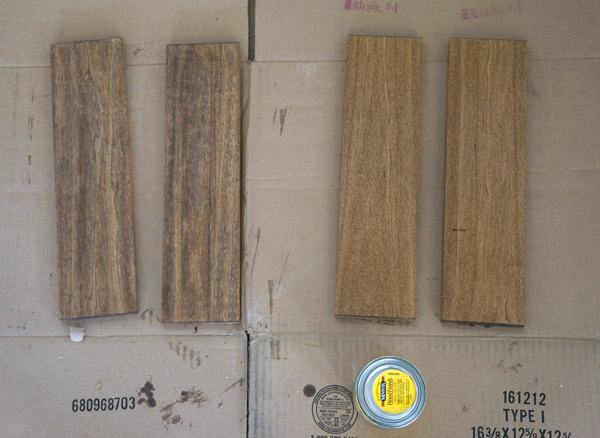
The 2 boards on the left were bought new, the right were left over from a previous project.  Although they're the same wood, I was surprised how differently they took the stain.  Luckily it didn't matter since 2 boards were going on one side of the house and 2 on the other.

At first my brain tried to over-complicate this installation.  I thought about using my kreg jig to attach the boards to one another and then attach the numbers before putting the assembly on the house, then about how to hang it on the house.....  Luckily I came to my senses and simplified.

First step was figuring out the placement on the porch posts.

House-number-placement

I decided that I wanted them just over a foot above the railings.  Using my level (which also has a handy ruler on it as well) I also figured out where to place the first board for the finished product to be centered.

DIY wood backed house number placement via Year of Serendipity

Holding that one board in place, I picked up my finish nail gun and placed a nail in the center of the board.

House-number-nail-gun

This holds it in place while I adjust it.  Even though I used my level, it's more important to have it parallel to the porch post.... which in a 100 year old house probably isn't 100% level anymore.  Once piece one looked level, I nailed piece number 2 next to it also with just one center nail.

DIY wood backed house number placement via Year of Serendipity

After stepping back and being pleased with their placement, I put a couple more nails into each board for stability.  I have to say, if you've never used a nail gun, you have no idea what you're missing.  I swear this is one of the most useful tools that I have!  Plus it's fun and helps me build pretty things.

With the backer board in place, it was time to install the house numbers themselves.
house-number-template

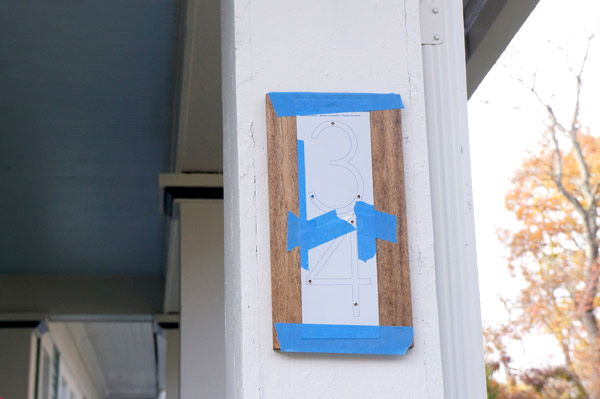
All I did here was follow the directions that came with the house numbers.  Place template, drill holes, put spacers onto numbers, glue/caulk spacers into drilled holes.

Craftsman bungalow wood backed house number DIY via Year of Serendipity

I'm kind of in love with them.  It's just what the outside of this house needed!

A big house needs house numbers that stand out.

Craftsman bungalow wood backed house number DIY via Year of Serendipity

Bonus if they make me smile.

Craftsman bungalow wood backed house number DIY via Year of Serendipity

Craftsman bungalow wood backed house number DIY via Year of Serendipity

The house is starting to coordinate with the fall decor delightfully.  I totally planned it that way...

Craftsman bungalow wood backed house number DIY via Year of Serendipity

Pockets and Tacks

My tiny little office really needs an injection of usefulness.  If you remember, this is my pseudo-desk area on top of my IKEA expedit cubbies. deco tray desk

It (along with the rest of our second floor) has BIG plans in store for this winter after my darling Millie is through with renovations.  I'll give you a hint.  It involves a long awaited allergy-friendly flooring switch-up.  Until that catalyst starts a new slew of renos into my house, I need to make this tiny room work.  It serves as my office, our extra TV room, and our rarely used ellipticals home.  With the ball rolling on my interiors business, Copper Dot Interiors, I need a place for notes, lists, swatches, ideas and inspiration.  All this has been cluttering the little bit of desk that I do have and causing me to avoid using the desk all together.  Kind of defeats the purpose.

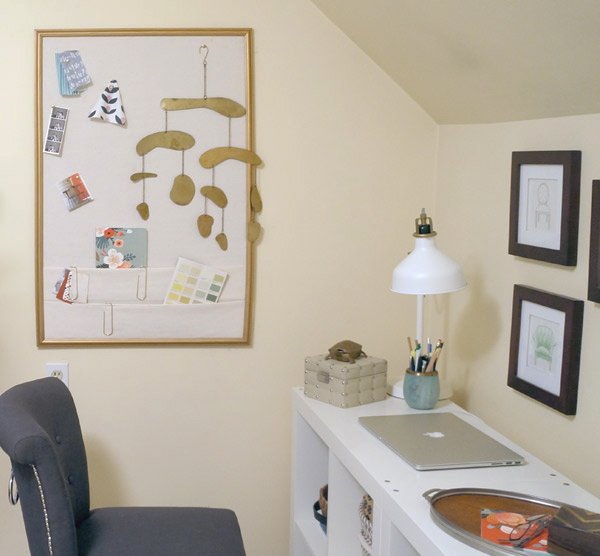
Luckily, a few errands and a few hours later, I put together exactly what this space currently needs to function: a fabric covered bulletin board, complete with pockets.

diy-tack-board

Not only was it a very gloomy weekend here and all of my photos were dark and gloomy, I still haven't figured out a way to take quality photos in this itsy space.  There is one window, but with the homes orientation, not much natural light comes in.  One day I'll figure it out and WOW you will my stunning office images.  Until that day, I'll photoshop them until they don't look weird.

So, bulletin board!

DIY-bulletin-board

I'm impatiently eagerly awaiting finding the PERFECT frame for this... something like this bulletin board on The Everygirl:

theeverygirl-pbteen-20s-1

but until I come across that gem, I decided to work with that was available- a $6 thrift store frame.

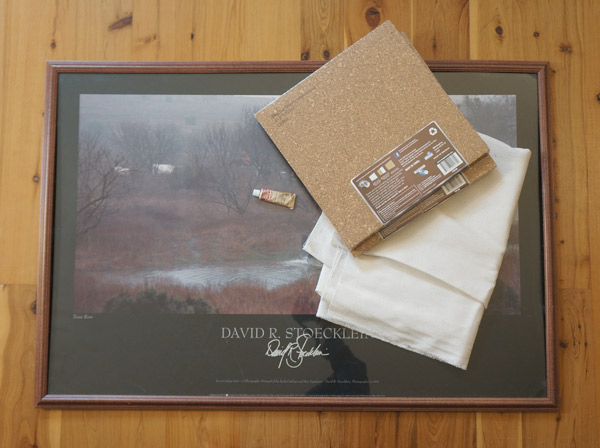
bulletin-board-supplies

The poster got sacrificed to the DIY gods.  In addition to a large frame- mine is 2'x4', I also used cork board tiles, a tube of rub n' buff, and my chosen fabric.

The frame got disassembled and the foam core backing got reused.  I used the double-stick adhesive squares that came with the cork tiles and stuck them onto the foam core.

DIY-bulletin-board-progress

Once the surface was covered, I trimmed the cork on a few of the edges where it overhung the foam.  Next, I sprayed the whole area with spray adhesive.  This helps the fabric grip and not bubble or wrinkle, but it still allows for repositioning.  The fabric is much dreamier in person.  It's the perfect texture with a slight natural fleck in the color.  I wish it showed more in the pics.

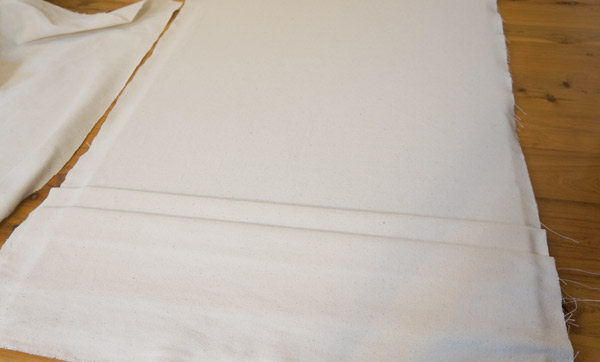
DIY-bulletin-board-fabric

The pockets are created by folding the fabric- the deeper the folds, the deeper the pockets.  I knew these would be necessary for function and keeping clutter off of my desk top but not out of mind.  After the fabric was placed, the spray adhesive held well enough to allow me to flip the foam core/cork board over and staple the fabric around it.

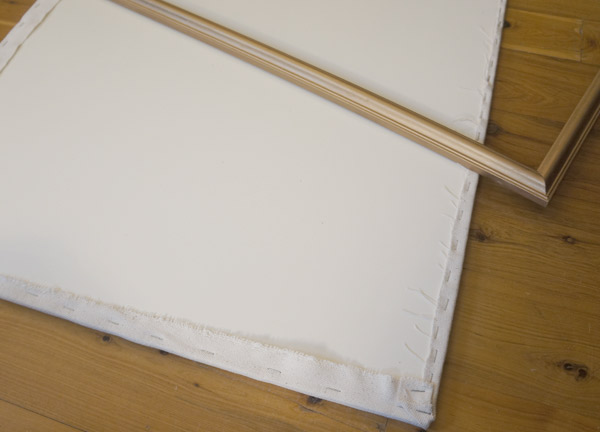
DIY-bulletin-board-pieces

Magically, while I created the bulletin board, the plastic faux wood frame suddenly turned to gold!  Ok, not so suddenly or magically.  After disassembling the frame back at step 1, I used rub n buff in antique gold to make the frame shinier and less fake-wood-looking.  Once my board was wrapped and my frame was goldified, I popped the board back into the frame and used high-tech duck tape to hold everything together on the back.  I used my favorite 3m picture mounting strips to hang it (not sponsored, just love them) and voila!

DIY-bulletin-board-office

Since this is most likely a temporary frame until the right one pops into my life, I'll most likely be reworking this along with the entire room in the near future.  I can see the room now, new desk chair, paint, window treatments, rug.... she'll be a beaut!!

DIY-bulletin-board

Until then though, I have a super functional and easy on the eyes DIY fabric covered bulletin board!


Millie: Week 10

I hope you enjoy these weekly updates as I learn to navigate through the business of flipping houses.  This flip, Millie is the most challenging and most exciting yet! You can find more about this house and about my 3 previous flip houses here. After 10 long weeks, the exterior of the house is almost done!  If we just look out here, I can pretend the whole house is almost done!  I'm throwing a lot of before pics into this post because they really show how far this house has come.

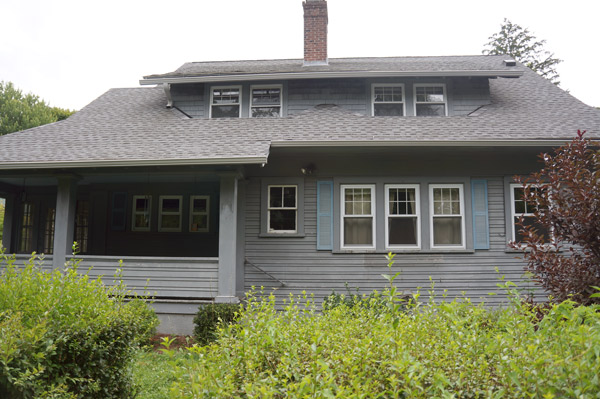
When we bought her, Millie was an overgrown gray box, remember?

Millie-exterior

Aside from a few minor touch ups, painting is done!

Millie week 10 painted house front via Year of Serendipity

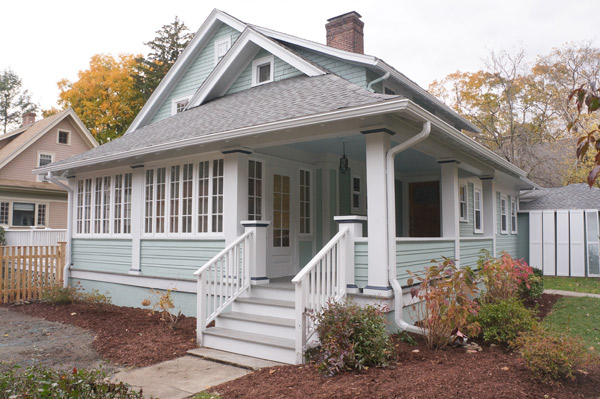
As I mentioned a few weeks ago, as I uncovered the house from the weeds, I realized that the side was intended to be the curb-appealed front, so I treated it as such.  You never would have known before-

Millie-Ext-1

but this was hiding underneath.  Wow I took out a lot of trees/bushes.  Now I just need the grass to grow there! (The painters also painted my yet-to-be-installed new garage door as you can see leaning on the garage)

Millie week 10 painted house curb appeal via Year of Serendipity

I'm ridiculously happy with the new fence that my contractor installed on this side.  The old fence spanned the length of the yard,returned to the front porch stairs and was about to fall down.

millie-before-old-fence

The new fence extends only to the end of the back deck, letting the sun room and front porch become the 'front'.  And it's pretty.  And has a gate so you can actually get a lawn mower to the back yard.  What a novelty!

Millie week 10 craftsman fence via Year of Serendipity

If you haven't noticed in the front yard pics, new mulch has been spread throughout the entire yard.  66 bags to be precise, and my back is tired.  BUT the result is so worth it.  I apparently don't have any pics of this view of the back yard before we started attacking weeds, but even from this week 2 progress pic

Millie-w2-back-yard

there's a little bit of a change.  Looking a little less jungle-like in my opinion

Millie week 10 back yard transformation

And just for effect, let's look at the side yard again.  The side yard was wholly unusable due to weeds before.

Millie-Ext-13

It's almost hard to believe that the overgrown holly at the corner of the deck above is the same nicely groomed one below.  Not pulling your leg, I swear.

Millie week 10 side yard

The other side of the house, or the lanai as I like to call it

Millie-Ext-11

also got some new fencing (to replace rotten fencing) and more mulch, but nothing drastic.

millie week 10 lanai

Traveling inside, I was destructive once again.  In the kitchen, I pulled up the top layer of linoleum and it's accompanying plywood and started to remove about 5 kagillion staples.  I know it doesn't look like much since there are still 3- THREE!!- layers of vinyl tile that still need to go away to reveal my hardwoods underneath.

Millie week 10 kitchen floor

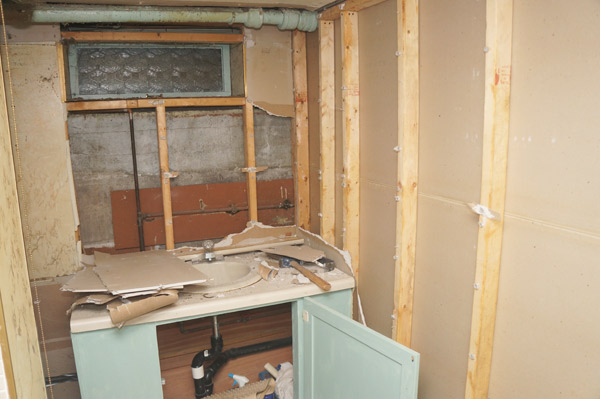
And in the anticipation of my plumber getting started next week, I smashed more- this time in the icky basement bathroom.

millie week 10 basement bathroom

But since the outside is far and away the prettier view currently, I'll leave you off with that view.

Millie week 10 curb appeal via Year of Serendipity

Still left on the exterior is fence completion on the lanai side, trim and door repair on the garage, exterior lights, growing grass (or sodding, we'll see), fixing one broken pane of glass, replacing door knobs/locks/deadbolts, repairing the front door, installing a screen door on the back door, and adding house numbers.  Seems like nothing compared to how far she's come already!!

Happy Halloween and have a great weekend!!