Concrete Tile Art

Now that the new railing is installed and the 12' entry and stairwell are painted (phew!), the upstairs hall was screaming for something special.  While I enjoyed the previous acoustic tile 'art' that had been chilling there for 3 years, it's time for an upgrade. When I purchased my antique newel posts, I also made an impulse purchase- 4 salvaged concrete tiles.  Seriously impulse- they had a single concrete tile sitting at the checkout, so when I went to buy the posts it was love at first sight.  They pointed me to the pile of 20 and I shoveled through the broken or hopelessly chipped and rescued the best 4.

trunk-tiles

Once home, then I started trying to devise a plan of how to hang concrete on a wall.  My mind went through tons of complicated contraptions and finally settled on the simplest solution.  Gorilla Glue, wood, & 3m picture hangers.                   *side note* No sponsors, just trusty products that I keep finding new uses for

The back of the tiles were jagged- let's call it rustic.

concrete-tile-backs

The picture hangers wouldn't stand a chance sticking on the concrete, so I needed to provide them a flat surface to adhere to: wood.  And what better way to get wood and concrete to marry than some serious glue.

concrete-tile-glue

After spending several hours stacked with a lead weight on top, the romance between wood and concrete became enduring.

concrete-tile-weight

Next came picture hangers rated for 12lbs.  Each concrete tile isn't even close to 12lbs, but I'd rather be safe than sorry.  I think I'd cry if these things came crashing down on my gorgeous, but soft refinished pine floors.
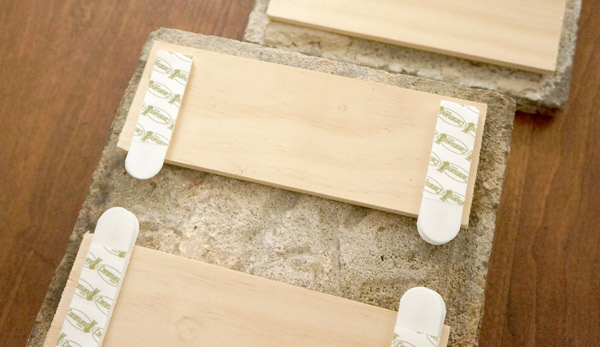
concrete-tile-hangers

I'm so happy to see this new art hanging at the top of the stairs!

Concrete tile art

Concrete tile art

What's even more exciting is: if I get sick of the pattern as it currently stands, I just need to flip the tiles (requiring no modifications or reconfiguring to hang differently thanks to the picture strips) and a new pattern emerges.
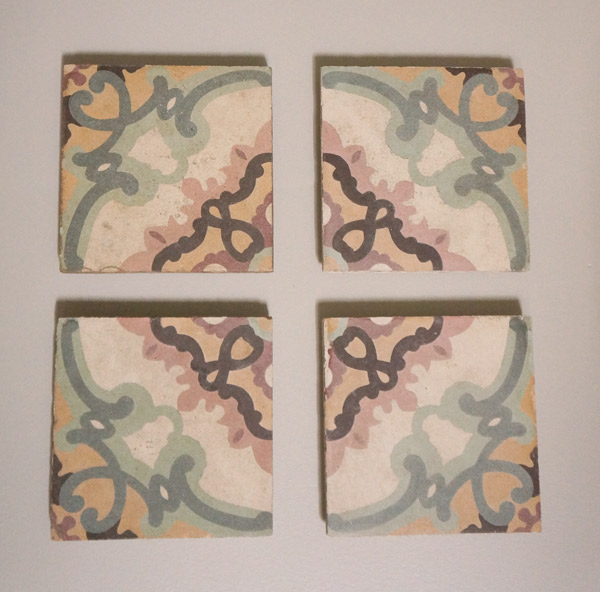
Concrete tile art- alt pattern

How cool is that?

I can't help but wonder about their origin.  Were they in grand foyer perhaps?  Or maybe a posh powder room?  I wish I could have seen them in all their original glory!

Dori the Flip House: week 3

I hope you enjoy these weekly updates as I learn to navigate through the business of flipping houses.  My latest flip house, Dori sports the 3 L’s in real estate, but will need more than a bit of creativity to make the house sellable. You can find more about this house and about my 4 previous flip houses here. Week 3 is here, more smashing happened, and now I wait.  Dori's little town is getting a new building inspector, but he's taking a vacation naturally.  What does that mean for me?  It means that we need to wait at least another week before we have a building permit.  No permit, no windows or touching anything structural.  Boo.

I can confidently say, though, that my part of demo is complete.  As is paying for some brute labor to take down the eyesore sheds.  Arrivederci!

dori-w3-shed1

A dirty, smelly (oh goodness the smell) task that would have taken me weeks and probably multiple injuries, took 2 20-something guys just over half a day.

dori-w3-shed2

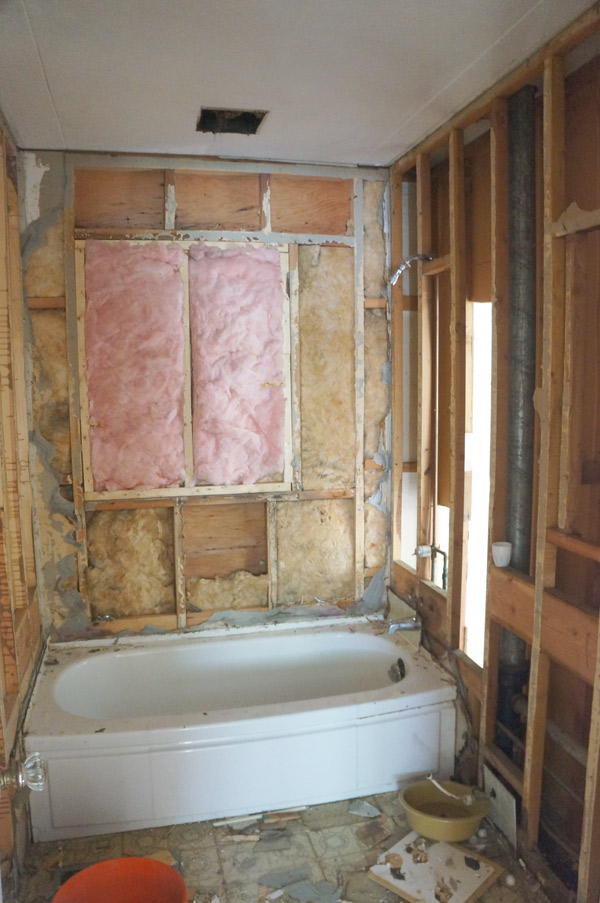
Meanwhile inside, I took down all the old paper wall-board in the bathroom, since paper+water is not an ideal combination.... you can use your imagination...  And the tub should be getting replaced early next week!

dori-w3-bathroom2 dori-w3-bathroom1

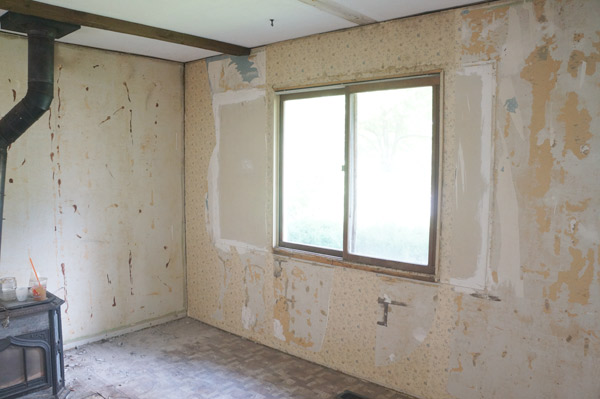
I have determined that the previous owners must have been sunlight hating vampires, which I guess is why the house felt like a cave when I got it.  Once I peeled back layers, I discovered that not only was there originally a window in the shower (where I plan to put a new one anyway), but the living room window was once significantly larer.  In an ideal world, I'd make the living room window larger again, but windows have already been ordered.

dori-w3-living-room

The kitchen is also now fully removed and the room will never look bigger.  It will look better though.  Just picture the new kitchen- a breakfast bar/peninsula taking the placed of the studs on the left and nice white, shaker style cabinets on either side leading into the dining room where there will soon be a slider on the back wall.  I will get light into this house any way I possibly can.

dori-w3-kitchen

Proper electrical will help with that problem too.  Because apparently it's not 'normal' to have a ceiling fan in one room controlled by a switch in another room.  Who knew?  Lucky I have my trusty electrician on the task.

dori-w3-wiring

I have a feeling next week will be a bit torturous for me since progress will be at a near stop until the permit comes in.  I can probably scrounge up a few projects to work on, but I'll have to wait for the progress leaps and bounds that I was hoping for.

Have a wonderful weekend!

On the Rail

With my house finally coming back together after the floor/stair/railing reno, I have TONS of awesome DIYs planned for you guys.  For some strange reason, however, Hubby's pretty insistent that I install baseboards and door trim and finish painting before I start decorating.  Silly boy.  So basically, big, exciting things are coming, but my house needs to look like a house first.  Sad Trombone. I thought I'd pop in quickly today and show you that we are no longer at high risk for falling down the stairs- we have a railing!!!  I coerced my contractor (since we're still awaiting permit on the flip) to come and install this beaut.

railing

With 2 super sexy newel posts that used to not be super sexy.

oldnewel

newel-1

After all my crazy patching, I ended up painting it with a base of solid stain, then countless coats of Polyshades to give it a multi-dimensional, stained look.  I have some touch-ups to do now that they're installed, but I humbly think my paint treatment worked!

It's weird that we never realized how low our old railings were until we got one of the proper height.  Don't get me wrong, we knew the height was off, especially at the top, but check out the hole where the old railing hit the wall- a good 9 inches lower!

railing-4

The entire old railing wasn't 9" lower, just the return at the top, but man was it awkward.  As you can see, 2 spindles are missing and replacements have been ordered.  For some reason, my count was 1 less than was actually needed since we changed the configuration a bit (the top newel post moved up a step) and one snapped during install.  No sweat, I've been assured by my contractor that I can install them myself without issue.

railing-2

Now we just need to get used to not only using and seeing a railing again, but one that is the proper height!

Next step for these stairs? A runner!  These buggers are slippery now that they're refinished.  Slippery + already steep stairs = runner as necessity.