Plaster Patching

How to patch a swirled ceiling // Year of Serendipity I'm sure we've all seen it: a badly patched textured ceiling.  Joe Homeowner has a damaged textured ceiling and attempted to patch it himself.  He grabbed whatever patching compound he had and spread it over the damage in hopes no one would notice.  The resulting gloppy patch sticks out from the rest of the ceiling like a sore thumb.

For a hot second with this lastest flip, I thought I was free and clear with the textured ceilings- a few of the flat ceilings had issues, but the textured ones looked in good condition.... until I scraped the wallpaper in the hallway and discovered this gem.  The plaster layer of the ceiling was loose and started to crumble and fall the moment I touched it.

damaged plaster ceiling

No Joe Homeowner gloppy fix here!  Unless you're really looking for it, you'd never realize there was a patch! (cue sigh of relief here)

repaired plaster swirl ceiling

As it turns out, a large part of getting the patch to match (giggle) is in the magic coverup mixture:

plaster patch mix

Mix ceiling paint with joint compound until you have a mixture only slightly thinner than peanut butter.

ceiling patch mix

Once I had the mixture set, I went straight for the ceiling and got it perfect on the first try.  KIDDING!  I took a scrap of drywall and started testing out how to get the desired texture.  I tested out 3 different brushes that I had at the house.

texture testing

My verdict was to use the regular paint brush for application, then the large paint brush to texturize.  Now comes the ceiling... but not quite with the texture just yet.

I started with my ceiling by using regular (non-mixed with ceiling paint) joint compound to fill in where the plaster was missing.

ceiling patch

Once that dried, I sanded it and had a great base to texturize from.

sanded ceiling patch

Now comes the fun/difficult part.  As I mentioned above, I used a regular brush to spread the texturizing mixture, then used a large brush to add the correct scale to match the rest.  I paid careful attention to the directionality and pattern of the existing swirls, and tried my best to layer them and match them appropriately.

plaster swirl patch

This wasn't a first try result- I stepped back a few times and re-swirled, stepped back again..... etc... until it started looking like it should.

Not perfect, but definitely a good start.  The biggest difference between the new swirls and the old was the definition.  The new swirls were nice and sharp, the old had been painted over for 50 years.  To make the new swirls blend more, I took sandpaper to it once the patch was dry.  I feathered the edges out and dulled out some of the sharp texturing.

plaster swirl patch sanded

The last step was just to paint the entire hallway ceiling a crisp coat of white.  That was the true test: once everything was the same color, would the patch be noticeable?

plaster swirl ceiling

I'd call it a success!  Would I recommend this for a large blemish in the middle of your living room as a permanent fix?  Probably not.  In that case, skim-coating the entire ceiling would yield the best result... but as a quick temporary fix or a smaller patch in a less visible area (like mine), go for it!!

repaired plaster swirl ceiling

I'm rather proud of the finished result and how well it blends in with the old ceiling.  It's pretty near impossible to get the patch to match 100%, but I dare you to notice it when you're in the space.

Have you had any experiences (good or bad) in attempting to patch a textured ceiling?  I'd love to hear about it!

Blogland Inspiration

bhg-vertical-garden.jpg

I owe you guys some serious DIYs.  Longer days and warmer weather (at long last) always lights a fire under me, though, so I'll be DIYing like crazy soon!  Until then, I thought I'd share a few things to inspire from around blog land. Please pin responsibly and from the original sources that I have linked to.  Muchos gracias!!!

1.  A Beautiful Mess's studio bathroom make-over.  If you aren't jealous of the fact that they bought a beautiful old house to use as a studio/project space for their blog then you're probably lying to yourself.  Swoon away.

a beautiful mess studio bathroom

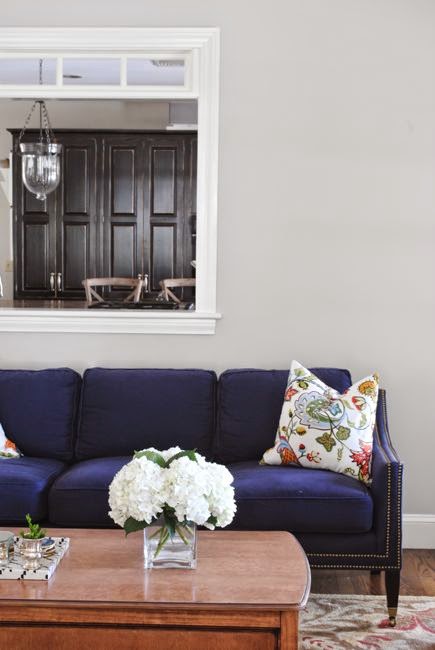
2. Jen over at The Chronicles of Home breathed new life into this amazing navy sofa.  Definitely going to make me look at worn fabrics in a different light.

chronicles of home sofa

3. I think I might need to adopt this desktop wallpaper from DesignLoveFest.... since, ya know, I've been apparently spraying everything gold...

all gold

4. Local Boston designer, Stephanie Sabbe hit a home run with this amazing city kitchen renovation.  The before was not terrible, but the after is to die for.  Click over to check out the full space which was also just featured in the Boston Globe!

sabbe kitchen

Ok, Monday, let's do this!


Grover: Week 7

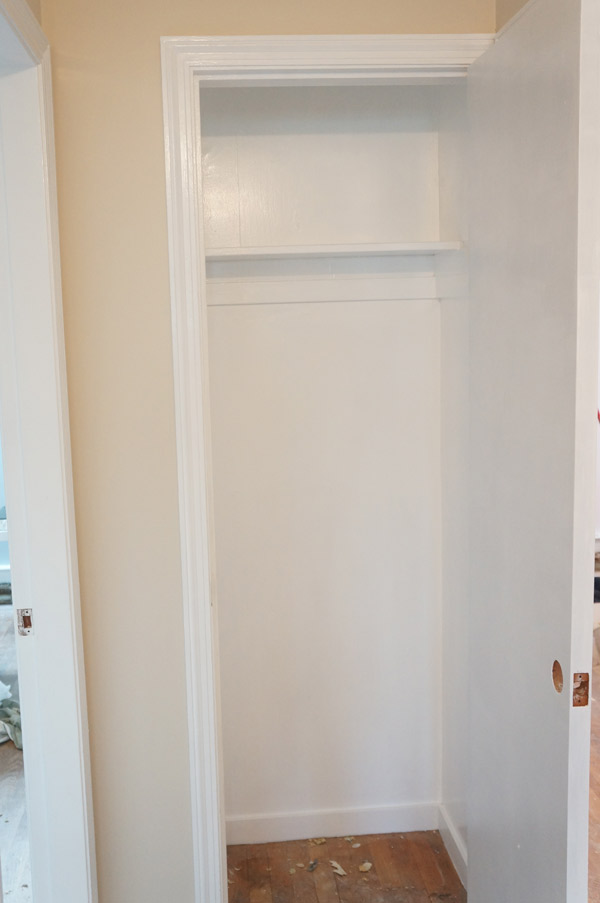
I hope you enjoy these weekly updates as I learn to navigate through the business of flipping houses.  Check out  more about this flip, Grover, or check out posts about our last flip HERE. I think I'll be painting for the rest of my life.  Guess what.... I painted more this week!  One bedroom and the hallway and their respective closets (aside from some minor touch-ups) are complete!!!  And that includes the trim and the ceilings.

w7-bedroom

That means that these rooms are ready for the floors to get refinished!  I guess it's time to call the floor guy and get him going.

w7-hallway

w7-hall-closet

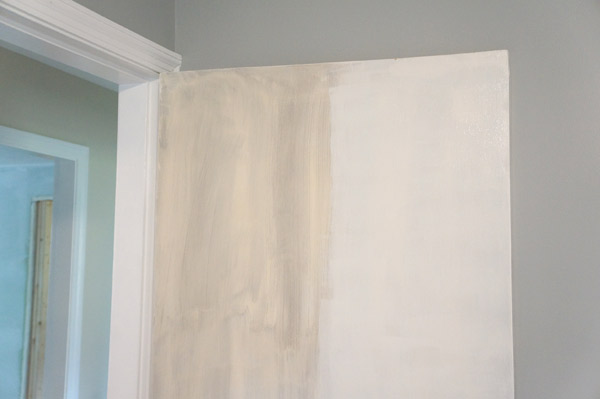
The bedroom and closet doors are on their way too.  Most are primed and a few have a first coat of finish paint.  At first, I tried to use the latex primer that I already had on hand on the previously unpainted doors...

w7-prime-door

Latex primer on the left, oil based primer on the right.  Difference much?  I was hoping to avoid the smell, but you'll save yourself several coats if you just start with oil based primer.  Lesson learned.

But painting's actually not all that got accomplished this week, surprisingly.

I'm ridiculously proud of the patch I did on the swirled hallway ceiling.  I'll be sharing my process next week, but until then... patch?  what patch?  Ok, so it's not perfect, but you only see it if you're really looking.

w7-ceiling-patch

The electrician also tackled a bunch work throughout the house... homeowner wiring is kind of like a puzzle... For example: a 3-way switch that goes to the basement stair light, also apparently is controlled by another 3-way switch in the garage and also leads to another mysterious, un-locatable light that's most likely hidden in the finished area in the basement.  Sounds logical.  His most visible progress this week was relocating the thermostat and doorbell (and outlet and switch) from the removed wall.  Speaking of the wall, it passed the first inspection, so that means the drywall can go up!

w7-electrical

While the electrician worked away and I painted away, the contractor tiled away.  Clean white subway tile in the shower always puts a smile on my face.  Not only because it looks lovely, but also because it means that I can get started on the rest of the bathroom!!  I'm not excited for that or anything. (!!!!)

w7-shower

I'm getting started on tiling the floor today (since the contractor laid the backer board on the floor for me.... it took them part of a morning- that would have been at least a 2 day job for me).  I started dry-fitting the tile yesterday.  That's always fun because you get to see what it'll look like without any of the mess involved.

w7-tile-fit

The plumber is coming back Monday to fix a broken toilet flange (the part in the floor that the toilet mounts to), so if I have the tile laid by then, I can get the toilet reinstalled too!  Since this is the only toilet in the house, the less amount of time it's out of commission the better.  Luckily, my sister lives 5 min down the road, so I don't have to rely on a porto-pot or public bathrooms.  Thanks Sis!

Hopefully from this point, the progress will be less of watching paint try and will forge ahead in leaps and bounds!

Have a great weekend!