There's a first time for everything, right? How about a yummy recipe today? I have holiday desserts still on the brain.
I do not cook. Don't get me wrong, if I really wanted to, I can cook, but it's not my cup 'o tea. That's what I have a Hubby for. I do, however enjoy baking for special occasions. Something about licking the bowl and spoon make the effort all worth it.
Meringues get a bad rap for being time consuming to make, but the making part is pretty quick, it's the baking part that takes a while and you just need to set it and forget it. I've started using meringues as a go-to dessert for a couple reasons. A- they're sinfully addicting and B- allergy friendly. Somehow in our small group of friends we've managed to collect almost every food allergy you can imagine, but this little treat satisfies them all- gluten free, nut free, dairy free, etc.
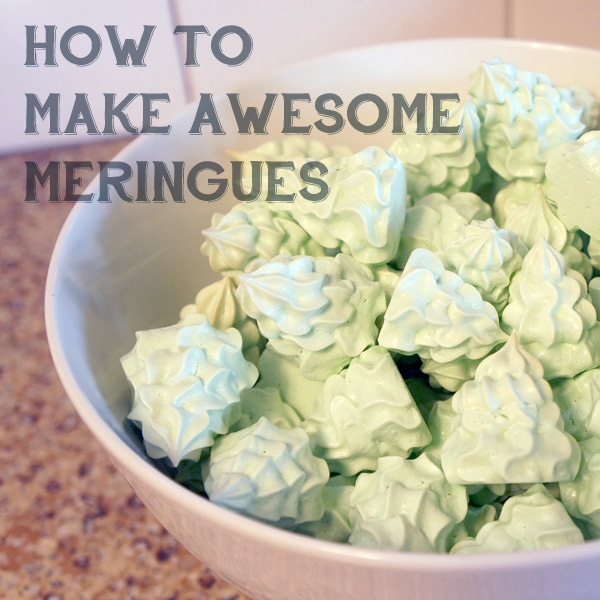
Here's my favorite recipe and it's super simple, I promise. I'm not a baker, but I do watch a ton on food network, so that almost makes me qualified, right???
- 3/4 cup of sugar
- 3 egg whites
- 1/2 tsp cream of tartar
- food coloring or flavoring to taste if you feel like it
You'll want to separate the eggs when they're cold, but then wait to mix them until they are at room temp. This seems to make the texture of the final product infinitely better and I wish I knew this tip a year ago.
Once your eggs are at room temp, beat them and the cream of tartar at medium speed until they get frothy. (This is also a good time to preheat your oven to 200)
At this point you'll want to start adding in your sugar slowly. I usually grab a 1/4 cup and sprinkle it in slowly until I've mixed it all 3/4 in. Don't dump or you'll have undissolved sugar clumps and no one wants that.

With all the sugar mixed in, beat on high until you get shiny, stiff peaks. If you'd like to add color or flavor, this should be done towards the end of the beating. I generally add green gel food coloring for my Christmas tree meringues, but leave them colorless for making Halloween Ghosties. I've also made this recipe using a 1/4 tsp of mint extract or vanilla extract for a little something extra, but the unflavored meringues will be just as delectable.
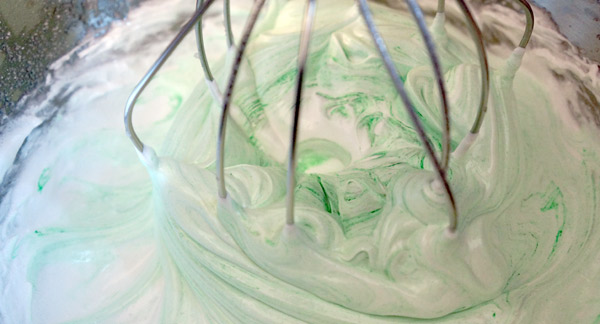
Once you're done beating, your meringue should look a little like this. Stiff and shiny. (I'll wait while you stop giggling)

It should be quite the challenge getting the meringue off the beater. If it gets too difficult, might I recommend your tongue? ** *disclaimer* consuming raw egg can increase your risk for food-borne illness. Despite its deliciousness, eat at your own risk.**
Now comes the fun part- piping them onto the cookie sheets.
I use parchment paper on cookie sheets, a disposable piping bag, and a star tip to make my trees. (for my ghosties, I still use the bag and tip coupler, but leave the tip itself off)

You are guaranteed to get a little messy during this, but that's part of the fun, right? In an effort to minimize the sticky mess and get as much meringue in the oven as possible, once you're ready to put your meringue into your piping bag, fold out the top few inches- a little trick courtesy of my grandma. This gives your hand a bit of a shield, gives you a place to scrape off the meringue, and also guarantees that you don't overfill your piping bag.

Once filled, unfold the end of your bag and twist it closed.

This part might take a few practice attempts, but I promise it isn't hard. Put one hand at the top of the piping bag, holding closed the twist. This hand will be doing most of the work by squeezing out the meringue. Use the other hand to guide. Practice on a plate if you need to get the hang for it.

By creating 3 or 4 decreasing size tiers with your star tip, you get a shape very reminiscent of a Christmas tree. The good news about meringues is, even if they aren't pretty, they still taste wonderful, so they'll be devoured no matter if they look like trees or the elephant man.

Twist the top of the piping bag more as you go along so that the bag always feels full.

Once you've piped out all of your meringues, place your cookie sheets into your preheated 200 degree oven and wait. If you vary the shape or size, the time will vary, but for my fat little Christmas Trees, I leave them in the oven for about an 1 hour and 30 min. Meringues want to be super dried out so as long as you don't up the temp, there shouldn't be too much of a danger of over cooking or burning. After an hour and change, turn off your oven, and leave the meringues in to cool. Sometimes you can skip this step, but you risk the danger of them getting sticky later (I speak from experience).
Once your meringues are cool, taste test a couple, pop them off the parchment, and into your serving vessel. Just try not to eat ALL of your awesome meringues before your guests arrive.

So there you have it- simple, delicious, allergy-friendly, festive meringues. What's your favorite holiday treat to make?
Follow-up: after posting I found out about a similar post on Wildflour's Cottage Kitchen with a few more tips and variations. I love her use of the nonpareils as tree decoration, go check it out!