Millie: Week 5

I hope you enjoy these weekly updates as I learn to navigate through the business of flipping houses.  This flip, Millie is the most challenging and most exciting yet! You can find more about this house and about my 3 previous flip houses here. Week 5 is apparently where I start to get anxious about how little work has gotten done in the interior.  Let's get husslin!

I spent a little bit more than half of the week this week loading yard waste strategically into a dumpster.  I believe I have now achieved the status of dumpster tetris master jedi.  The dumpster was essentially full after the first day and I only had half the yard waste in so I had to be very strategic.  By the time the dumpster got picked up, I doubt I could have fit a single stick more.  I received this text after my dumpster got picked up.  Just look at that corner definition- that's talent if I ever saw it.

dumpster jedi

image courtesy of Joshua, I'll Take That Junk

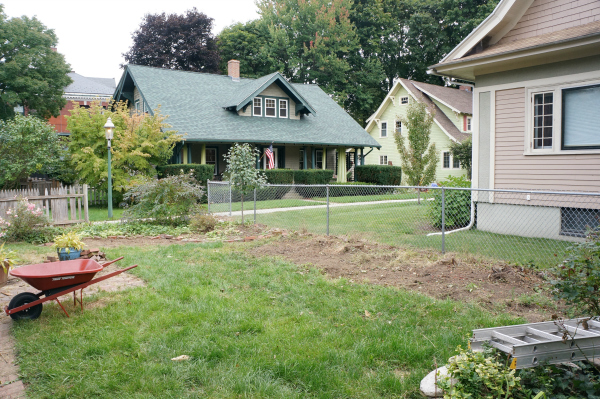
But that means that the yard is finally clear! (disclaimer: I do mean clear of yard waste... construction debris and demo is a different story, however)  Now we can finally get to the 22 stumps that need grinding down.
Millie w5 back yard 2

Considering where we started from, this is pretty remarkable.  The 2 below are taken from almost the same spot, although you'd never be able to tell.

Millie-Ext-10

Millie w5 back yard 3

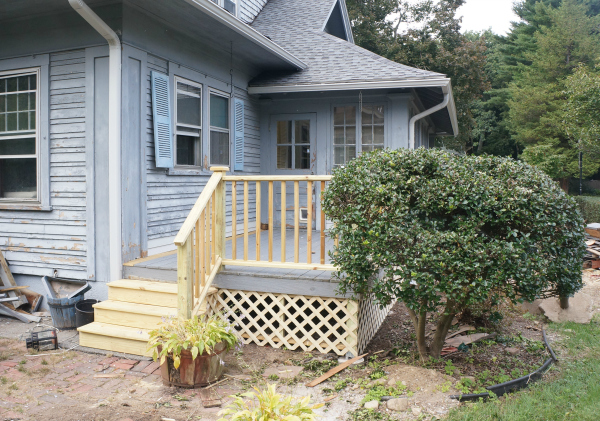
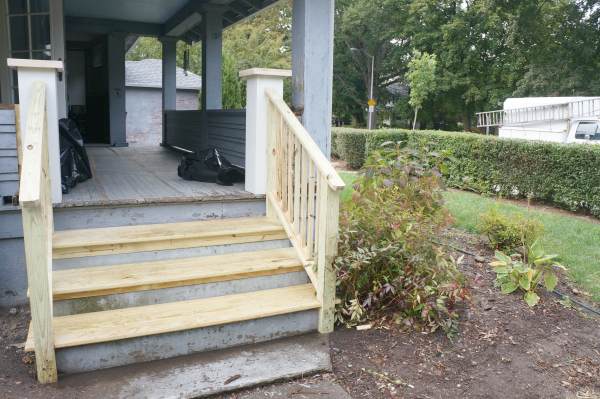
Around the side, the porch is just about finished with it's spruce up, the holly got a delightful haircut, and the contractor has moved to the front porch.
Millie w5 back porch

Trying to figure out a way to make the new railings tie into the old porch was a bit of a challenge, but once these are finished, have trim and are painted, I doubt anyone will think twice.
Millie w5 front porch

And look!  Some grass is actually starting to grow!!

Millie w5 grass

While the contractor was busy on the porches, the electrician was busy working on the knob and tube, and the painter was busy power washing, I kept myself busy making messes.  Smashy smashy time!
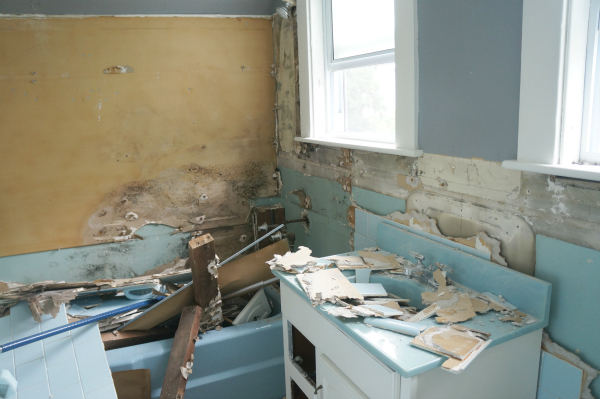
Millie w5 bathroom

Methinks I'll be needing a demo dumpster next week.  Luckily for me, the demo isn't the entire house- just the bathroom, partial kitchen, attic floor, and the future master closet.
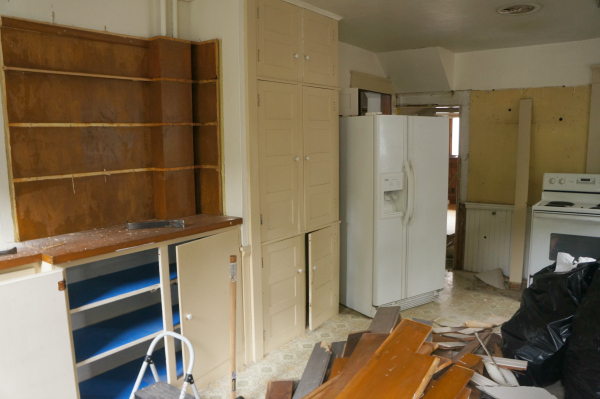
Millie w5 kitchen

I have a pretty good motivation to get this demo done fast so that my plumber can get started.  Every time the toilet flushes upstairs (in the blue rubble pile), it drips into the future master closet just outside the kitchen (I need a shower just thinking about it).
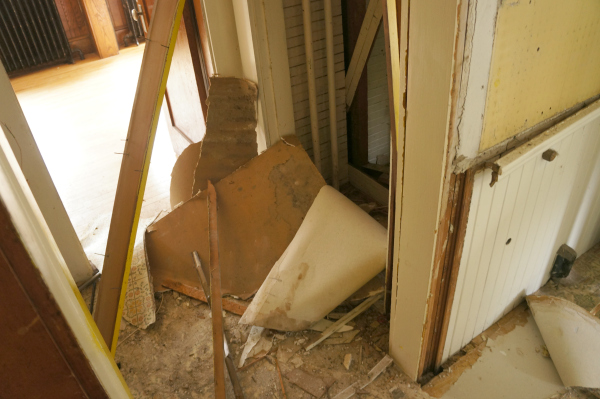
Millie w5 future closet

There's good and bad news in regards to the kitchen/closet floors though.  I think I mentioned last week that I was pretty sure there were hard woods lurking under.  There are!....... however, as I peeled back the layers of linoleum, under 2 layers of linoleum and a layer of plywood and on top of the wood floors, I came across what is most likely asbestos tile... big boooo.  I've left a few messages for asbestos removal places so we'll see what the quotes say.

And now that I'm starting to think about the interior, more craigslisting has begun!  You already know about the tub in the sunroom, but I also purchased a sink for the upstairs bathroom.  It looks rather unassuming now, but it actually has dainty chrome legs and when I fancy it up with a nice gooseneck faucet- she'd gonna be a looker! (Hubby and just about everyone else is skeptical.  Trust my vision people, I can see it now!)

Millie w5 sink

I've also received a little bit of history from one of the neighbors.  According to a report from 2008, this house was actually built in 1914, NOT 1902 as records state.  It was built by Fred E. Richardson who built all the bungalows in the little 'walkable community' as the report calls it, and first owned by John Otis Hale.  With every tidbit of knowledge I gain about the house, I want to know more!

Now that the ball is steadily rolling both inside and out, let's hope it gains momentum!

Concrete Bandwagon

All aboard for the Concrete surface Bandwagon! If you aren't a big diy blog reader, you probably have approximately zero idea what I'm talking about, so allow me to explain.  I am now the proud owner of a 10lb bag of Ardex Feather Finish, and I can not wait to give it a try!!!!!  Introduced to the DIY blog land by Kara Paslay, Ardex Feather Finish is like frosting for your countertop.  Essentially it allows you to create the look of a polished concrete surface by simply covering up your old surface.  No demo of your old countertops, no pouring messy concrete into makeshift forms- only a thin coating of concrete that result in pretty surfaces that look substantial, textured, and just all around awesome.

lgn concrete counter

via Little Green Notebook

I've been dying to find a project to try this out on and I've finally found it!  I'm going to make you wait until probably next Wednesday or maybe even the following Monday to tell you cuz I'm mean like that, but I will tell you it's not my countertop, or Millie's countertop, or a floor, or a table..... You'll just have to wait and see!

Until I perfect my hand at the Ardex amazingness, I'll show you a few of the projects that lured me to the dark side into wanting to try it.

1. I have to start with Kara Paslay.  Not only is she pretty much the one that started it all with this countertop redo,

Kara Paslay Ardex Counter

but she's also used Ardex for just about everything- like creating this pretty sweet patterned table top.

Kara Paslay Ardex Table

2. John and Sherry jumped on the bandwagon not all that long ago by DIYing the countertops in their latest home.  It's not their long term solution since they have hopes for an eventual full kitchen renovation, but it's worlds better from where the kitchen started!

YHL concrete counters

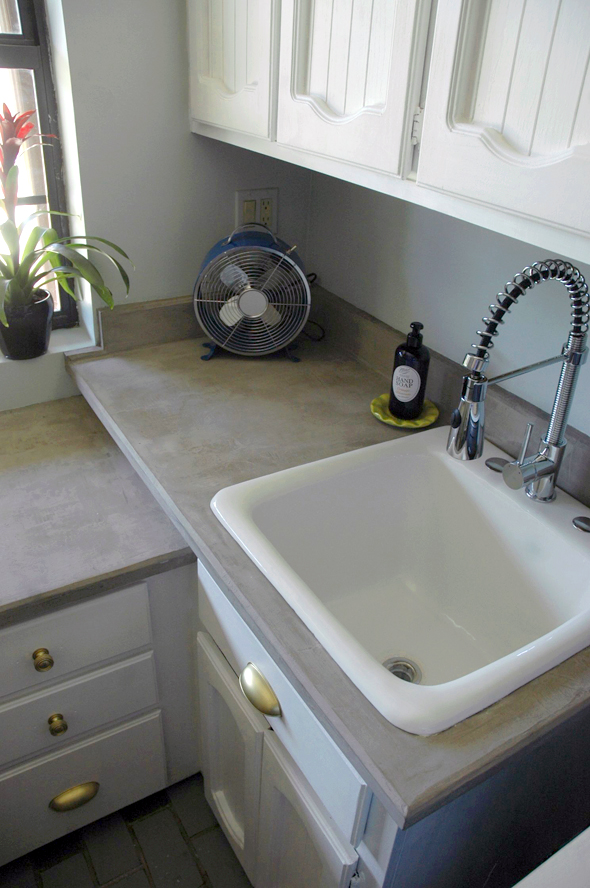
3. Jenny's laundry room on Little Green Notebook is my personal favorite for several reasons.  First of all, I love the concrete look as part of the whole room composition- so successful!  Second of all, I'm insanely jealous over pretty laundry rooms since my own is a corner of my unfinishable 100 year old basement... and lastly..... gold hardware.  I'm a sucker.

lgn laundry room ardex

What I really love about all these projects is that the Ardex looks like it belongs.  It doesn't look like one of those countertop refinishing kits that just makes your laminate look a little bit less bad (I'll be ripping one of those out very shortly at Millie).  These just show that DIY doesn't always have to look it.

I can't wait to start my own Ardex project!  It's. going. to. be. epic.... ok, maybe a little bit of an oversell, but still, I can just picture the end result and it'll be happy-dance-inducing at the very least!

Strong Like Bull

This week may be a light week for blogging- my computer's on the fritz again, so my apologies ahead of time. We now return to your regularly scheduled programming.

Tubs!  Wait, didn't I already blog about this?  Yes, but now I got one of the 2 tubs that I need and I just KNOW you want to hear all about it!  Or something like that.  In reality, I was searching high or low for someone to tell me how hard or easy it was to move a cast iron claw foot tub and couldn't find anything helpful, so I'm hoping to provide that service to someone else.  I'm only thinking of you.

Have I mentioned before that I love Craigslist?  Only once or twice, I'm sure.  I remember the primitive days when my dad would list things in the Bargain News.  My how far we've come.  I was able to procure an antique cast iron tub in rather good condition for $20.  Yes, $20!  (ended up costing a little bit more, but I'll explain)

The deal was the I could buy this tub from amongst the rubble for $20 IF....

Tub amongst the rubble via Year of Serendipity

...I moved it down 3 flights of stairs

tub stairs

I'm sure you can see my dilemma.  $20!  yay!  3 flights of windy narrow stairs? boo!  A huge part of my dilemma came from trying to figure out how to move something of this sheer weight.  I'd estimate it around 300 lbs.  With Hubby at work and not willing to call in any friend favors to move a tub for my business, I realized I needed to pay someone.  One moving company quoted me $550 with a truck and 3 guys- that's more than I paid to move all the staging furniture!  No me gusta!  Luckily my next quote was much more my speed.  A man with a van.  Literally the name of his company and he came with many 5 star yelp reviews for helping people move Craigslist purchases.  $170 to help me move it from the 3rd floor, transport it, and move it into Millie?  You got it!!!

Let me tell you, yes a cast iron claw foot tub is heavy, BUT it's not nearly as bad as I was afraid of.  It took Mike the Mover, the seller and me to move it down the stairs.  The 3rd person was honestly only for security and logistics (making sure no one has a tub fall on them).    It definitely helped that the feet were already detached and I would highly recommend that to anyone!

cast iron claw foot tub feet via Year of Serendipity

One thing that made it easier is that we were moving it from a house that was being completely gutted, so letting the tub surf (guided and controlled of course) down the carpeted stairs wasn't a problem.  If I was moving it from a house that we'd have to worry about scratching stairs or wall, we'd naturally have to be more careful and take a bit more time, but I would imagine that the process wouldn't change much.

Once on flat ground, the tub was pretty easy to maneuver.  I swear!  It may be heavier than a couch, but it's smaller, so the lack of bulk makes it easier to move in my opinion.  Mike the Mover used a hand cart to get it from the stairs to the front door, then it was furniture dollies from there.  It took us only 2 people to lift the tub onto a furniture dolly and roll it as needed to the vehicle and from the vehicle to Millie.  It even wasn't bad lifting it up 4 stairs to get to Millie's porch.  I'm sure Mike the Mover was skeptical when he saw this skinny girl claiming she could move a tub, but I'm strong like bull!  It didn't take nearly as long as I expected to get it from one place to the other.  Now my new tub is hanging out in Millie's sunroom so I can paint the bottom in a well ventilated area.  I keep flip-flopping between white or black.....

upside down cast iron tub via Year of Serendipity

I swear, if you can move a couch, you can move a cast iron claw foot tub!!

So there you have it.  The story of how I got a $20 tub on craigslist, paid $170 for help moving it and a priceless story knowing I'm capable of moving a cast iron claw foot tub.  Now I only need one more for the upstairs bathroom.....